 Kia Forte: Floor Console Assembly Replacement
[Floor Console Assembly]
| ŌĆó
|
Put on gloves to protect your hands.
|
|
| ŌĆó
|
When prying with a flat-tip screwdriver, wrap it with
protective tape, and apply protective tape around the related
parts, to prevent damage.
|
| ŌĆó
|
Use a plastic panel removal tool to remove interior trim
pieces to protect from marring the surface.
|
| ŌĆó
|
Take care not to bend or scratch the trim and panels.
|
|
|
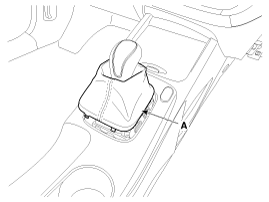
1. |
Disconnect the gear boots (A).
|
|
2. |
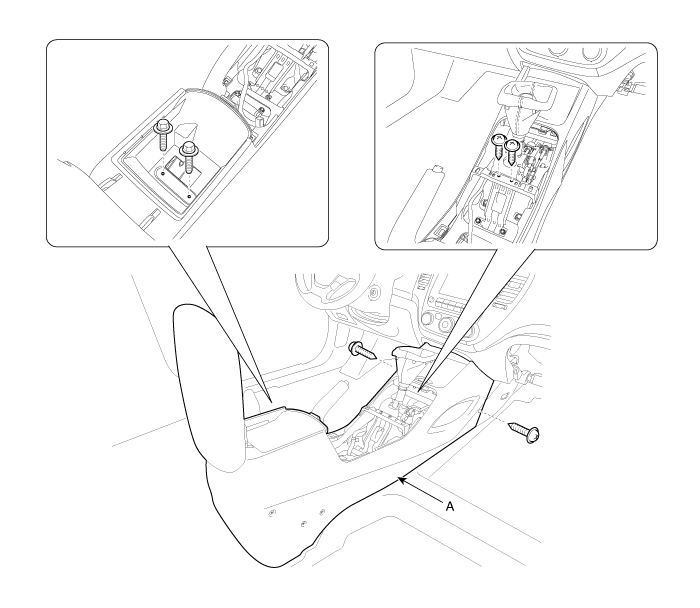
Using a screwdriver or remover, remove the console upper cover
(A).
|
|
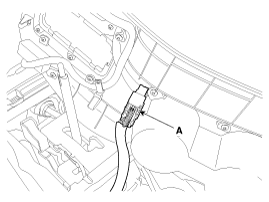
3. |
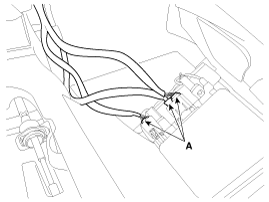
Disconnect the connector (A).
|
|
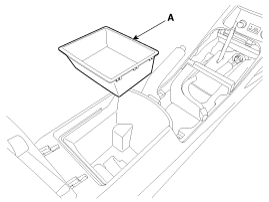
4. |
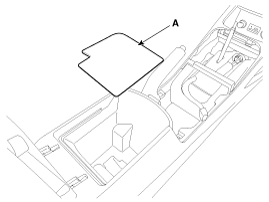
Remove the console armrest tray (A).
|
|
5. |
Remove the console armrest met (A).
|
|
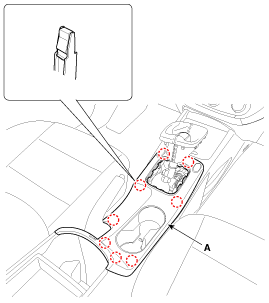
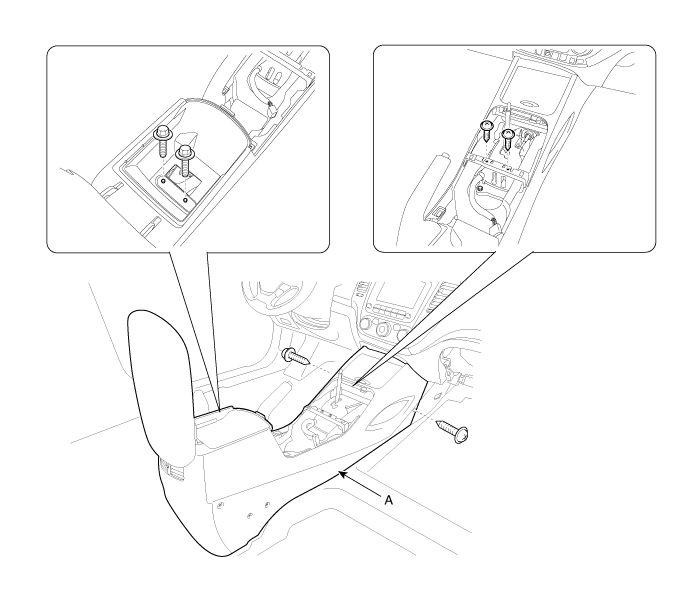
6. |
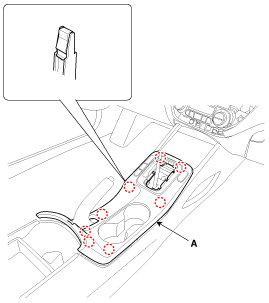
After loosening the mounting screws and bolts, then remove the
floor console assembly (A).
|
|
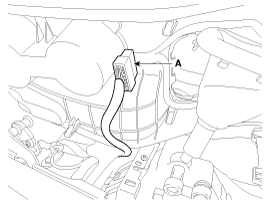
7. |
Disconnect the connectors (A).
|
|
8. |
Install in the reverse order of removal.
|
ŌĆó |
Make sure the connector is connected properly.
|
|
ŌĆó |
Replace any damaged clips.
|
|
|
| ŌĆó
|
Put on gloves to protect your hands.
|
|
| ŌĆó
|
When prying with a flat-tip screwdriver, wrap it with
protective tape, and apply protective tape around the related
parts, to prevent damage.
|
| ŌĆó
|
Use a plastic panel removal tool to remove interior trim
pieces to protect from marring the surface.
|
| ŌĆó
|
Take care not to bend or scratch the trim and panels.
|
|
|
1. |
Remove the gear boots (B) and gear knob (A).

|
|
2. |
Using a screwdriver or remover, remove the console upper cover
(A).
|
|
3. |
Disconnect the connectors (A).
|
|
4. |
Remove the console armrest tray (A).
|
|
5. |
Remove the console armrest met (A).
|
|
6. |
After loosening the mounting screws and bolts, then remove the
floor console assembly (A).
|
|
7. |
Disconnect the connectors (A).
|
|
8. |
Install in the reverse order of removal.
|
ŌĆó |
Make sure the connector is connected properly.
|
|
ŌĆó |
Replace any damaged clips.
|
|
|
[Console Side Cover]
| ŌĆó
|
Put on gloves to protect your hands.
|
|
| ŌĆó
|
When prying with a flat-tip screwdriver, wrap it with
protective tape, and apply protective tape around the related
parts, to prevent damage.
|
| ŌĆó
|
Use a plastic panel removal tool to remove interior trim
pieces to protect from marring the surface.
|
| ŌĆó
|
Take care not to bend or scratch the trim and panels.
|
|
|
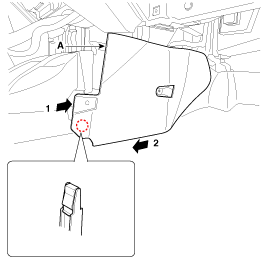
1. |
Remove the floor console assembly.
|
|
2. |
Remove it console side cover (A) by pushing it rearward.
[LH]
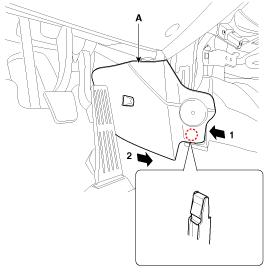
[RH]
|
|
3. |
Install in the reverse order of removal.
|
ŌĆó |
Replace any damaged clips.
|
|
|
1. Floor console assembly
...
1. Rear console cover
...


 Floor Console Assembly Component Location
 Rear Console Cover Component Location