 Kia Forte: Rear Package Tray Trim Replacement
Second generation YD (2014-2018) / Kia Forte TD 2014-2018 Service Manual / Body (Interior and Exterior) / Interior Trim / Rear Package Tray Trim Replacement
| (4Door) |
|
|
| 1. |
Remove the rear wheel house trim.
(Refer to Interior Trim - "Rear Wheel House Trim")
|
| 2. |
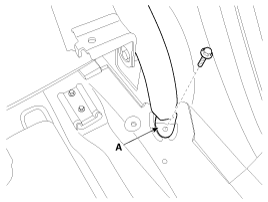
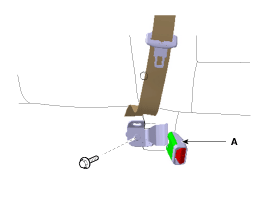
After loosening the mounting bolt, then remove the rear seat belt
lower anchor (A).
[LH,RH]
[Center]
|
| 3. |
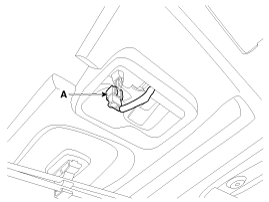
Disconnect the high Mounted stop lamp (A) connecter from inside
the trunk.
|
| 4. |
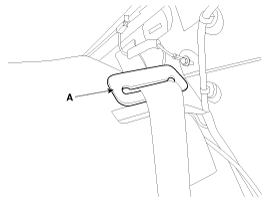
Remove the rear seat belt upper anchor cover (A).
|
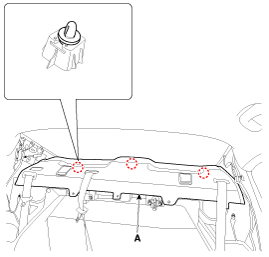
| 5. |
Using a screwdriver or remover, remove the rear package tray trim
(A).
|
| 6. |
Install in the reverse order of removal.
|
(2Door)
|
|
| 1. |
Remove the rear pillar trim.
(Refer to Interior Trim - "Rear Pillar Trim")
|
| 2. |
After loosening the mounting bolt, then remove the rear seat belt
lower anchor (A).
[LH,RH]
[Center]
|
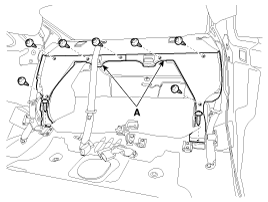
| 3. |
After loosening the mounting clips and screws, then remove the
rear partition trim (A).
|
| 4. |
Remove the rear seat belt upper anchor cover (A).
|
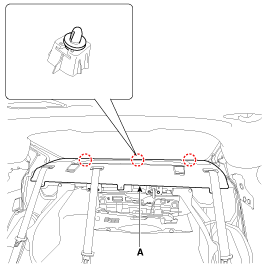
| 5. |
Using a screwdriver or remover, remove the rear package tray trim
(A).
|
| 6. |
Install in the reverse order of removal.
|
 Rear Package Tray Trim Component Location
(4Door)
1. Rear package tray trim
(2Door)
1. Rear package tray trim
...
 Luggage Side Trim Component Location
(5Door)
1. Luggage side trim
...
See also:
Telemetics Unit (TMU) Inspection
1.
After replacing the TMU unit, access Dealer Engineering Mode in
head unit.
(Refer to MTS system - "TMU Dealer Engineering Mode")
2 ...
Rear Seat Belt Buckle Component Location
(4Door)
1. Rear seat belt buckle [LH]
2. Rear seat belt buckle [RH]
(5Door)
1. Rear seat belt buckle [LH]
2. Rear seat belt bu ...
Thermostat Removal and Installation
Disassembly of the thermostat would have an adverse effect, causing
a lowering of cooling efficiency. Do not remove the ...
Copyright ® www.kifomanual.com 2014-2025


