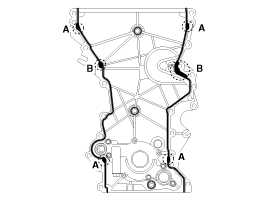
 Kia Forte: Timing Chain Cover Installation
Second generation YD (2014-2018) / Kia Forte TD 2014-2018 Service Manual / Engine Mechanical System / Timing System / Timing Chain Cover Installation
| 1. |
Install the timing chain cover.
|

| 2. |
Replace the front oil seal if necessary.
(Refer to Timing System - ŌĆ£Front Oil SealŌĆØ)
|
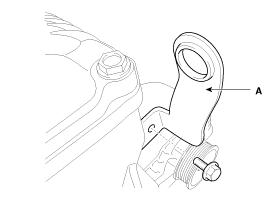
| 3. |
Install the front engine hanger (A).
|
| 4. |
Install the other parts reverse order of removal.
|
| 5. |
Add all the necessary fluids and check for leaks. Connect GDS.
Check for codes, note, and clear. Recheck.
|
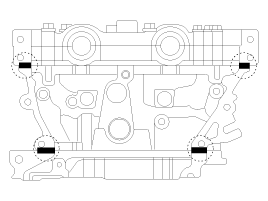
 Timing Chain Cover Removal
Engine removal is not required for this procedure.
ŌĆó
Use fender covers to avoid damaging ...
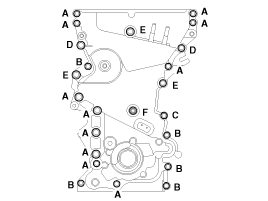
 Timing Chain Components
1. Intake camshaft
2. Exhaust camshaft
3. Intake CVVT assembly
4. Exhaust CVVT assembly
5. Timing chain
6. Timing chain tensioner arm
7. Timing chain tensioner
8. T ...
See also:
Drive Belt Tensioner Components
1. Alternator brace
2. Adjust nut
...
Rear Bumper Beam Assembly Component Location
(4Door, 2Door)
1. Rear bumper beam assembly
(5Door)
1. Rear bumper beam assembly
...
Engine Coolant Temperature Sensor (ECTS) Removal
1.
Turn the ignition switch OFF and disconnect the battery negative
(-) cable.
2.
Disconnect the engine coolant temperature sensor connecto ...
Categories
- Home
- Kia Forte BD 2019-2026 Owners Manual
- Kia Forte BD 2019-2026 Service Manual
- First Generation
- Second generation
- Kia Forte TD 2014-2018 Owners Manual
- Kia Forte TD 2014-2018 Service Manual

Copyright ® www.kifomanual.com 2014-2026