 Kia Forte: Power Door Lock Switch Removal
Second generation YD (2014-2018) / Kia Forte TD 2014-2018 Service Manual / Body Electrical System / Power Door Locks / Power Door Lock Switch Removal
Driver Door Lock Switch
| 1. |
Disconnect the negative(-) battery terminal.
|
| 2. |
Remove the front door trim.
(Refer to Body - "Front Door Trim")
|
| 3. |
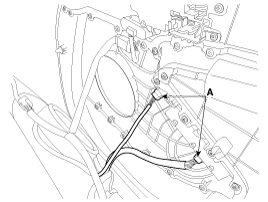
Disconnect the power window switch module connectors (A) from
the door trim.
|
| 4. |
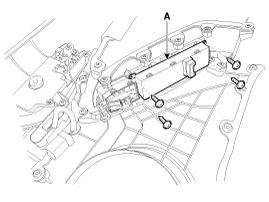
Remove the power window switch (A) after loosening 4 screws.
|
Passenger Door Lock Switch
| 1. |
Disconnect the negative (-) battery terminal.
|
| 2. |
Remove the front door trim.
(Refer to Body - "Front Door Trim")
|
| 3. |
Disconnect the power window switch module connector from the door
trim.
|
| 4. |
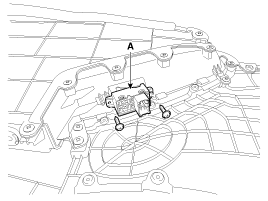
Remove the power window switch (A) after loosening the mounting
screws.
|
 Power Door Lock Switch Inspection
Driver Door Lock Switch
1.
Disconnect the negative (-) battery terminal.
2.
Remove the front door trim.
(Refer to Body - "Front ...
 Power Door Lock Switch Installation
1.
Install the power window switch.
2.
Connect the connector and install the front door trim.
...
See also:
Description
System Outline
An optimal seat position set by a driver can be memorized in Power seat
unit by IMS SW, which enables restoration of seat position set by the driver
despite.
P ...
Door Switch Installation
1.
Install in reverse of removal.
...
Resetting The Sunroof
Whenever the vehicle battery is disconnected or discharged, or you use
the emergency handle to operate the sunroof, you have to reset your sunroof
system as follows :
1.
...
Copyright ® www.kifomanual.com 2014-2026


