
 Kia Forte: Crash Pad Upper Panel Replacement
Second generation YD (2014-2018) / Kia Forte TD 2014-2018 Service Manual / Body (Interior and Exterior) / Crash Pad / Crash Pad Upper Panel Replacement
|

|

| 1. |
Remove the center fascia panel.
(Refer to Crash Pad - "Center Fascia Panel")
|
| 2. |
Remove the cluster fascia panel.
(Refer to Crash Pad - "Cluster Fascia Panel")
|
| 3. |
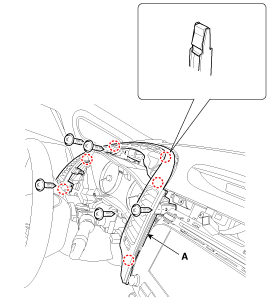
After loosening the mounting screws, then remove the drive airvent
duct assembly (A).
|
| 4. |
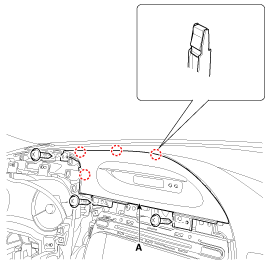
After loosening the mounting screws, then remove the clock fascia
panel (A).
|
| 5. |
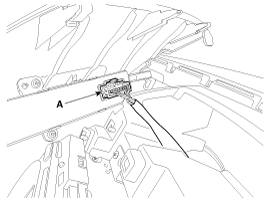
Disconnect the clock switch connector (A).
|
| 6. |
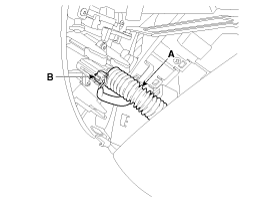
After loosening the mounting screws, then remove the center airvent
duct assembly [RH] (A).
|

| 7. |
Remove the in-car hose (A).
|
| 8. |
Disconnect the in-car sensor connector (B).
|
| 9. |
After loosening the mounting screws, then remove the crash pad
upper panel (A).
|
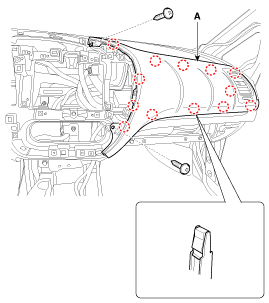
| 10. |
Install in the reverse order of removal.
|

 Crash Pad Upper Panel Component Location
1. Crash pad upper panel
...
 Crash Pad Lower Panel Component Location
1. Crash pad lower panel
...
See also:
Special Service Tools
Tool Name / Number
Illustration
Description
Band installer
09495-3K000
Installation of ear type boot band
Puller
09495-33000 ...
Component Location
1. Hood switch
2. Burglar horn
3. BCM and RF antenna
4. Key warning switch
5. Front door switch
6. Front door lock actuator & switch
7. Rear door lock actuator &am ...
Brake Booster Vacuum Pressure Sensor Installation
Brake Booster Vacuum Pressure Sensor can not be replaced separately
due to vacuum leak.
Therefore, the sensor mu ...
Categories
- Home
- Kia Forte BD 2019-2026 Owners Manual
- Kia Forte BD 2019-2026 Service Manual
- First Generation
- Second generation
- Kia Forte TD 2014-2018 Owners Manual
- Kia Forte TD 2014-2018 Service Manual

Copyright © www.kifomanual.com 2014-2026