 Kia Forte: Head Lamps Removal
Second generation YD (2014-2018) / Kia Forte TD 2014-2018 Service Manual / Body Electrical System / Lighting System / Head Lamps Removal
| 1. |
Disconnect the negative (-) battery terminal.
|
| 2. |
Remove the front bumper cover.
(Refer to Body - "Front Bumper Cover")
|
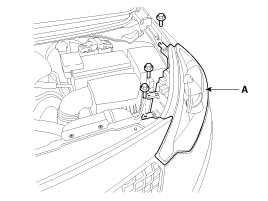
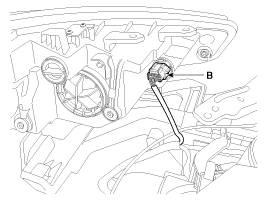
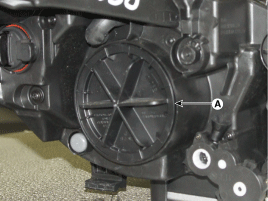
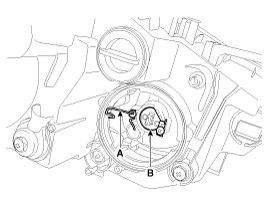
| 3. |
Loosening the head lamp mounting bolts (3EA) and disconnect the
head lamp connector (B).
Then, remove the head lamp assembly (A).
|


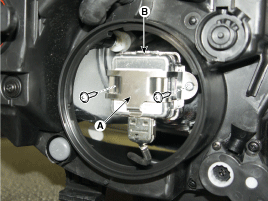
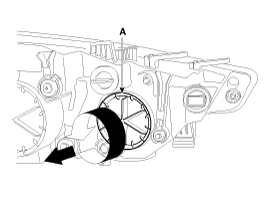
| 4. |
Remove the dust caps from the head lamp assembly after turning
in the counter clock-wise direction.
|
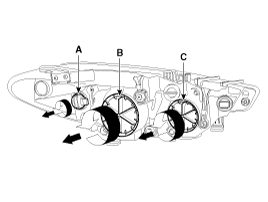
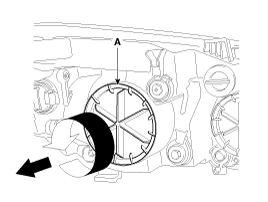
Head Lamp(low) Bulb
| [Gdneral Type] |
| 1. |
Turn the lamp switch off.
|
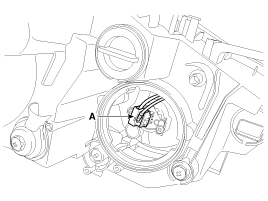
| 2. |
Disconnect the connector.
|
| 3. |
Remove the dust cap (A).
|
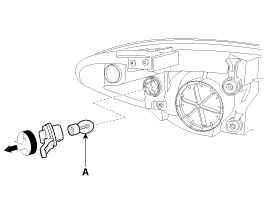
| 4. |
Seperate the bulb connector (A) from the head lamp assembly.
|
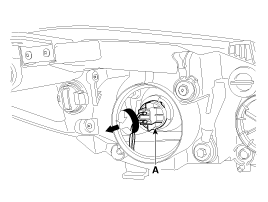
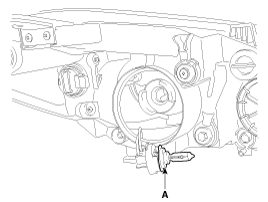
| 5. |
Remove the bulb (A) from the connector.
|
| [HID Type] |
Turn the head lamp switch off to avoid high voltage
Be careful not to damage the bulb and use genuine bulbs only
|

| 1. |
Turn the head lamp switch off.
|
| 2. |
Disconnect the connector.
|
| 3. |
Remove the dust cap (A).
|
| 4. |
Remove the ignitor (A) after loosening the screws.
|
| 5. |
Remove the ignitor and HID bulb (B).
|
Head Lamp(High) Bulb
| 1. |
Turn off the lamp power.
|
| 2. |
Disconnect the connector.
|
| 3. |
Remove the dust cap (A).
|
| 4. |
Disconnect the connector (A).
|
| 5. |
Remove the fixing clip (A) and bulb (B).
|
Ballast
| 1. |
Turn the head lamp switch off.
|
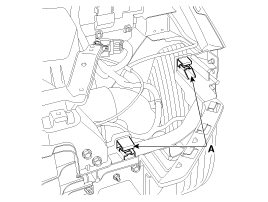
| 2. |
Remove the head lamp assembly.
|
| 3. |
Disconnect the power connector from the lamp.
|
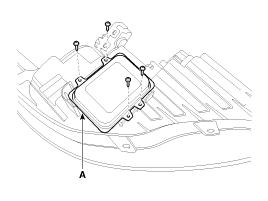
| 4. |
Remove the ballast (A) after loosening the screws (4EA).
|
| 5. |
Installation is the reverse of removal.
|
Turn Signal Lamp
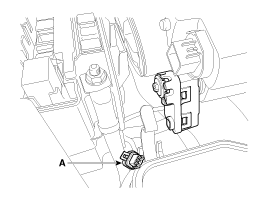
| 1. |
Turn the lamp power switch off.
|
| 2. |
Remove the socket and bulb (A) of turn signal lamp.
|
 Head Lamps Inspection
1.
Check-points upon head lamp failure (HID)
(1)
Check the battery voltage. (Low beam will be on when the
battery voltage above 9V.) ...
 Head Lamps Installation
1.
Install the head lamp bulbs.
2.
Connect the connectors.
3.
Install the head lamp bolts (3EA).
...
See also:
Adjustment
(5Door)
1.
After loosening the tail gate hinge (A) mounting bolt, adjust
the tail gate by moving it up or down, or right or left.
2.
...
Cruise Control Switch Inspection
[Measuring Resistance]
1.
Check for resistance between terminals in each switch position.
Function
switch
Connector
termi ...
Voice recognition
Using Voice Recognition
Starting Voice Recognition
Shortly press the
key on the steering wheel. Say a command
If prompt feedback is in [ON], then the system will say ŌĆ£Please say a command
...
Categories
- Home
- Kia Forte BD 2019-2026 Owners Manual
- Kia Forte BD 2019-2026 Service Manual
- First Generation
- Second generation
- Kia Forte TD 2014-2018 Owners Manual
- Kia Forte TD 2014-2018 Service Manual

Copyright ® www.kifomanual.com 2014-2026