 Kia Forte: AVN Head Unit Removal
Second generation YD (2014-2018) / Kia Forte TD 2014-2018 Service Manual / Body Electrical System / AVN System / AVN Head Unit Removal
AVN Head Unit
|
| 1. |
Disconnect the negative (-) battery terminal.
|
| 2. |
Remove the center fascia panel.
(Refer to Body - "Center Fascia Panel")
|
| 3. |
Remove the cluster fascia panel.
(Refer to Body - "Cluster Fascia Panel")
|
| 4. |
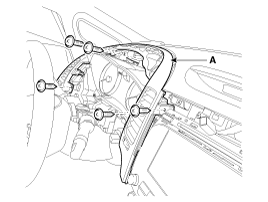
Remove the driver airvent duct assembly (A) after loosening the
mounting screws.
|
| 5. |
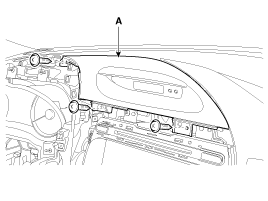
Remove the clock fascia panel (A) after loosening the mounting
screws.
|
| 6. |
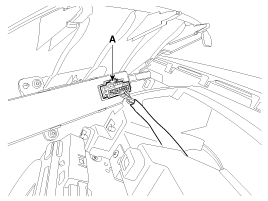
Disconnect the clock connector (A).
|
| 7. |
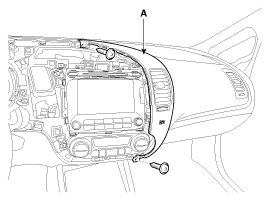
Remove the center airvent duct assembly [RH] (A) after loosening
the mounting screews.
|
| 8. |
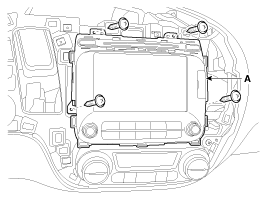
Remove the ANV head unit (A) after loosening the mounting.
|
| 9. |
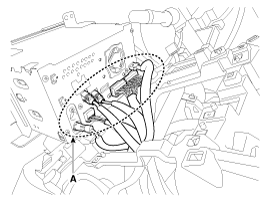
Remove the AVN head unit connectors and cables (A).
|
 AVN Head Unit Components
AVN Head Unit Connector (AVN)
Connector Pin Information
No.
Connector A
Connector B
1
Rear left speaker (+)
MM CAN high
2
...
 AVN Head Unit Installation
1.
Connect the AVN head unit connectors and cables.
2.
Install the AVN head unit.
3.
Install the airvent ducts ...
See also:
Power brakes
Your vehicle has power-assisted brakes that adjust automatically through normal
usage.
In the event that the power-assisted brakes lose power because of a stalled engine
or some other reason, you c ...
Oil Level Gauge & Pipe Removal and Installation
1.
Remove the oil level gauge (A).
2.
Install in the reverse order of removal.
...
Removal
1.
Disconnect the battery negative cable, and wait for at least three
minutes before beginning work.
2.
Remove the front seat assembly.
...
Copyright ® www.kifomanual.com 2014-2026


