 Kia Forte: Center Fascia Panel Replacement
Second generation YD (2014-2018) / Kia Forte TD 2014-2018 Service Manual / Body (Interior and Exterior) / Crash Pad / Center Fascia Panel Replacement
|
|
| 1. |
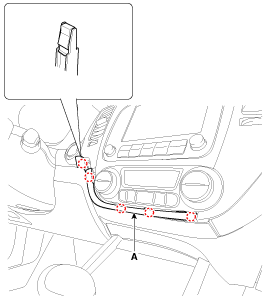
Using a screwdriver or remover, remove the center garnish [LH]
(A).
|
| 2. |
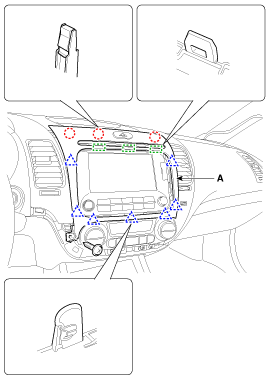
After loosening the mounting screw, then remove the center fascia
panel (A).
|
| 3. |
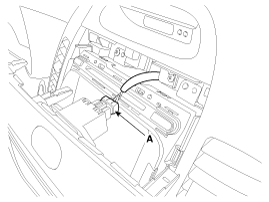
Disconnect the hazard switch connector (A).
|
| 4. |
Install in the reverse order of removal.
|
 Center Fascia Panel Component Location
1. Center fascia panel
...
 Crash Pad Upper Panel Component Location
1. Crash pad upper panel
...
See also:
DC/DC Converter Installation
1.
Install in the reverse order of removal.
If the battery negative (-) c ...
Rear Combination Lamp Removal
Rear Combination Lamp (Outside)
1.
Disconnect the negative (-) battery terminal.
2.
Remove the rear combination lamp cover (A).
...
Adjustment
(4Door, 2Door)
1.
After loosening the trunk lid hinge (A) mounting bolt, adjust
the trunk lid by moving it up or down, or right or left.
2 ...
Copyright © www.kifomanual.com 2014-2025


