 Kia Forte: Fuse/relay panel description
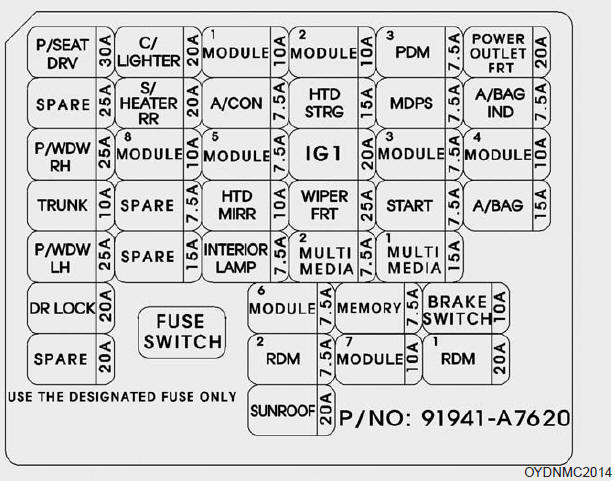
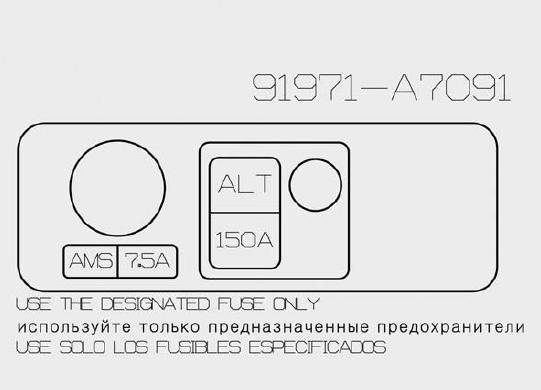
Inside the fuse/relay panel covers, you can find the fuse/relay label describing fuse/relay name and capacity.
✽ NOTICE
Not all fuse panel descriptions in this manual may be applicable to your vehicle. It is accurate at the time of printing. When you inspect the fuse panel in your vehicle, refer to the fuse panel label.
✽ NOTICE
The actual fuse/relay panel label may differ from equipped items.
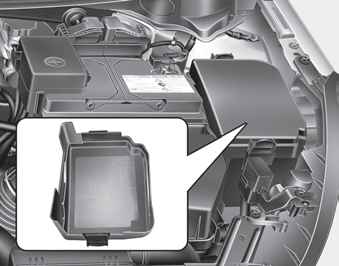
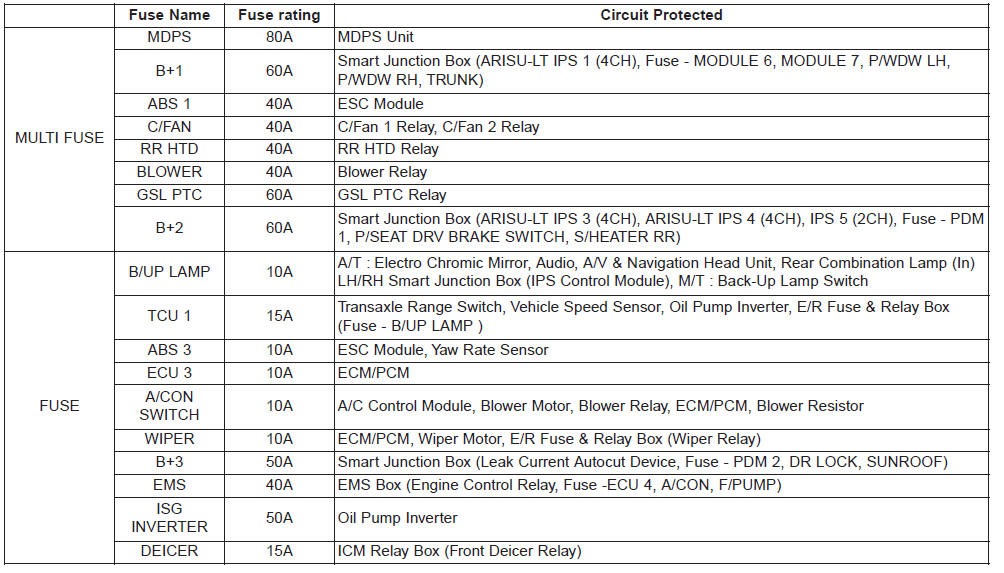
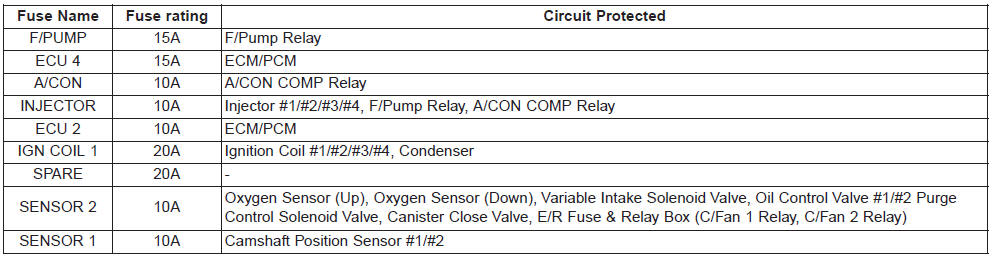
Engine compartment fuse panel
✽ NOTICE
Not all fuse panel descriptions in this manual may be applicable to your vehicle. It is accurate at the time of printing. When you inspect the fuse panel in your vehicle, refer to the fuse panel label.

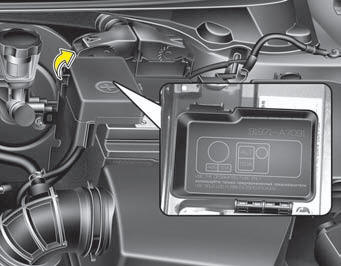
Engine room (Battery terminal cover)
✽ NOTICE
Not all fuse panel descriptions in this manual may be applicable to your vehicle. It is accurate at the time of printing. When you inspect the fuse panel in your vehicle, refer to the fuse panel label.
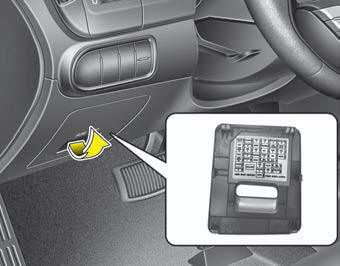
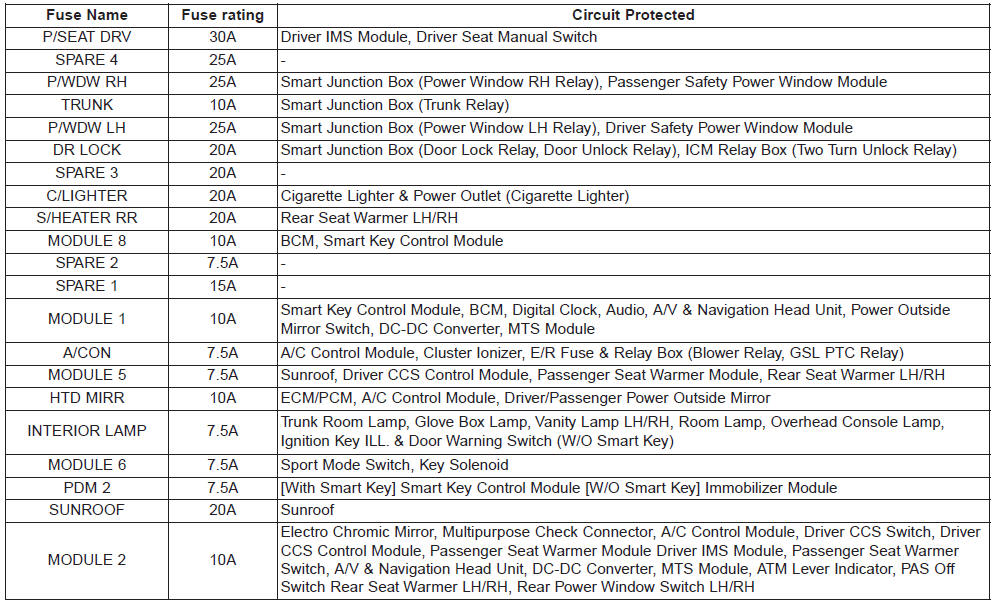
Instrument panel fuse panel

Engine compartment fuse panel
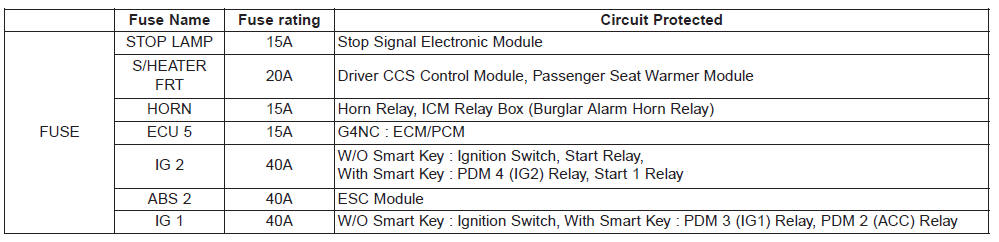
Engine compartment fuse panel (EMS BOX)
 Fuses
Fuses
A vehicle's electrical system is protected from electrical overload damage by
fuses.
This vehicle has 2 fuse panels, one located in the driver's side panel bolster,
others in the engine ...
 Light bulbs
WARNING - Lights
Prior to working on the light, firmly apply the parking brake, ensure that
the ignition switch is turned to the ŌĆ£LOCKŌĆØposition and turn off the lights to avoid
burning your fin ...
See also:
Fuel Pressure Regulator Removal
1.
Remove the fuel pump (Refer to ŌĆ£Fuel PumpŌĆØ in this group).
2.
Disconnect the electric pump wiring connector (A) and the fuel
sender ...
Rear Body
* These dimensions indicated in this figure are
actual-measurement dimensions. [ Unit : mm (inch) ]
Side outer p ...
Operation Condition for the ISG function
1. Auto stop or Auto start condition
(If all of the below condition are satisfied)
Items
State
Remark
Driving conditions
ISG OFF Switch
...
Categories
- Home
- Kia Forte BD 2019-2026 Owners Manual
- Kia Forte BD 2019-2026 Service Manual
- First Generation
- Second generation
- Kia Forte TD 2014-2018 Owners Manual
- Kia Forte TD 2014-2018 Service Manual
