 Kia Forte: CVVT & Camshaft Removal
Second generation YD (2014-2018) / Kia Forte TD 2014-2018 Service Manual / Engine Mechanical System / Cylinder Head Assembly / CVVT & Camshaft Removal
|
|
Timing chain cover removal is not required for this procedure.
| 1. |
Remove the cylinder head cover.
(Refer to Cylinder Head Assembly - “Cylinder Head Cover”)
|
| 2. |
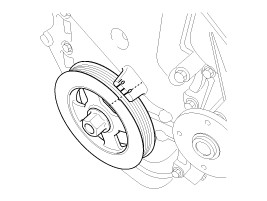
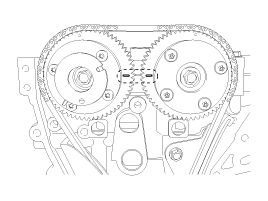
Set No.1 cylinder to TDC (Top dead center) on compression stroke.
|
| 3. |
Remove the crankshaft damper pulley.
(Refer to Timing System - “Crankshaft Damper Pulley”)
|
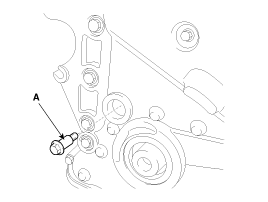
| 4. |
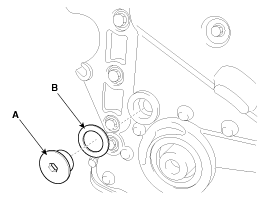
Remove the service plug bolt (A) with the gasket (B).
|
| 5. |
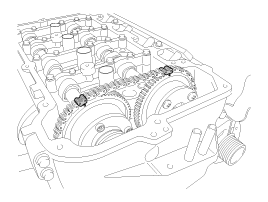
Remove the tensioner arm bolt (A).
|
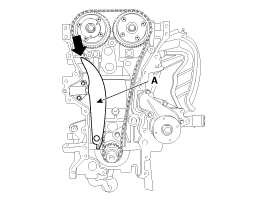
| 6. |
Push down the tensioner arm (A).
|
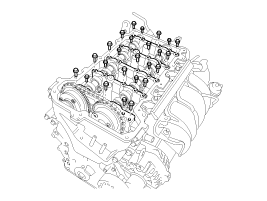
| 7. |
Remove the camshaft bearing caps.
|
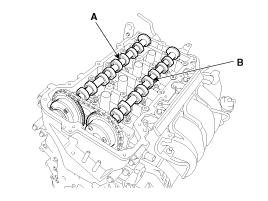
| 8. |
Remove the exhaust camshaft (A) first, then intake camshaft (B).
|
| 9. |
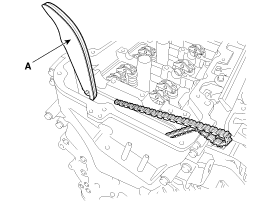
Remove the tensioner arm (A).
|
| 10. |
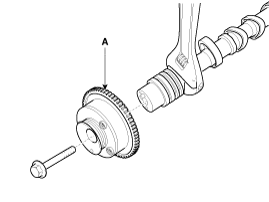
Remove the CVVT assembly (A) from the camshaft.
|
 [CVVT System Mode]
(1) Low Speed / Low Load
(2) Part Load
(3) Low Speed / High Load
(4) High Speed / High Load
...
 CVVT & Camshaft Inspection
Camshaft
1.
Inspect the cam lobes.
Using a micrometer, measure the cam lobe height.
If the cam lobe height is less than specification, replace the
camsh ...
See also:
Heater & A/C Control Unit (Manual) Replacement
1.
Remove the audio unit.
(Refer to Body Electrical System - "Audio Unit")
2.
After loosening the mounting screws, remove the ...
Description
•
Component location : Clutch
switch is connected to top of the clutch pedal assembly.
•
Function
1.
Clutch ...
Ignition Coil Inspection
1.
Measure the primary coil resistance between terminals (+) and
(-).
Standard value:
0.75Ω ± 15%
...
Copyright © www.kifomanual.com 2014-2025


