 Kia Forte: Fuel Filter Removal
Second generation YD (2014-2018) / Kia Forte TD 2014-2018 Service Manual / Engine Control / Fuel System / Fuel Delivery System / Fuel Filter Removal
| 1. |
Remove the fuel pump (Refer to ŌĆ£Fuel PumpŌĆØ in this group).
|
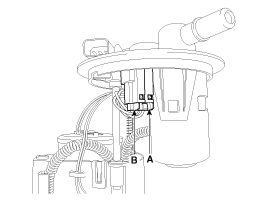
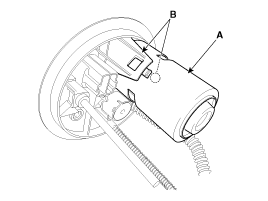
| 2. |
Disconnect the electric pump wiring connector (A) and the fuel
sender connector (B).
|
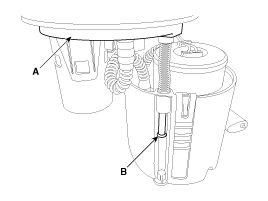
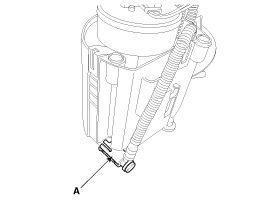
| 3. |
Remove the head assembly (A) after releasing the cushion fixing
clip (B).
|
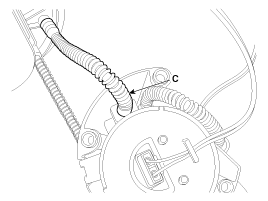
| 4. |
Disconnect the fuel tube quick-connectors (C).
|
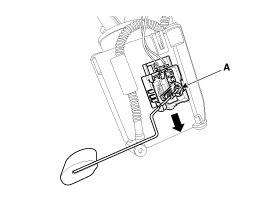
| 5. |
Remove the fuel sender (A) in the direction of an arrow.
|
| 6. |
Disconnect the fuel tube connector (A).
|
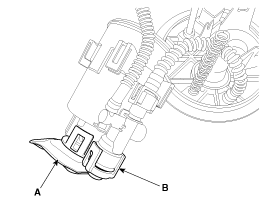
| 7. |
Remove the cut valve (A) after releasing hooks (B).
|
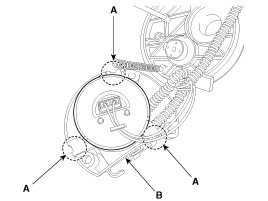
| 8. |
Remove the reservior-cup (B) after releasing the fixing hooks
(A).
|
| 9. |
Release the fixing hooks, and then remove the pre-filter (A) and
the fuel pressure regulator (B).
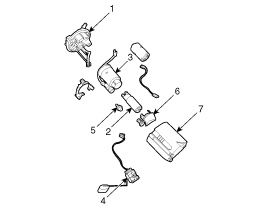
1. Head Assembly
2. Electric Pump Motor
3. Fuel Filter
4. Fuel Sender
5. Fuel Pressure Regulator
6. Pre-filter
7. Reservoir cup
|

 Fuel Pump Installation
1.
Install in the reverse order of removal.
Be careful of fuel pump direc ...
 Fuel Filter Installation
1.
Install in the reverse order of removal.
...
See also:
Components
...
Resetting The Sunroof
Whenever the vehicle battery is disconnected or discharged, or you use
the emergency handle to operate the sunroof, you have to reset your sunroof
system as follows :
1.
...
High Mounted Stop Lamp Removal
[2 Door]
1.
Disconnect the negative (-) battery terminal.
2.
Remove the rear roof trim.
(Refer to Body - "Roof Trim Assembly&qu ...
Categories
- Home
- Kia Forte BD 2019-2026 Owners Manual
- Kia Forte BD 2019-2026 Service Manual
- First Generation
- Second generation
- Kia Forte TD 2014-2018 Owners Manual
- Kia Forte TD 2014-2018 Service Manual

Copyright ® www.kifomanual.com 2014-2026