 Kia Forte: Sub Frame Replacement
Second generation YD (2014-2018) / Kia Forte TD 2014-2018 Service Manual / Suspension System / Front Suspension System / Sub Frame Replacement
| 1. |
Loosen the wheel nuts slightly.
Raise the vehicle, and make sure it is securely supported.
|
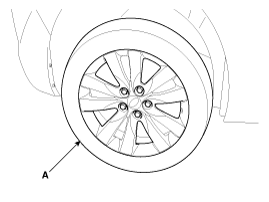
| 2. |
Remove the front wheel and tire (A) from front hub.
|

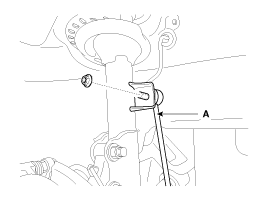
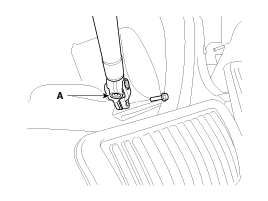
| 3. |
Disconnect the stabilizer link (A) from the front strut assembly
after loosening the nut.
|
| 4. |
Remove the split pin and nut and then disconnect the tie-rod end
(A) from the front knuckle.
|
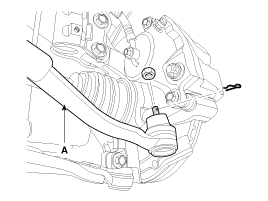
| 5. |
Loosen the bolt & nut and then remove the lower arm (A).
|
| 6. |
Loosen the bolt and then disconnect the universal joint assembly
(A) from the pinion of the steering gear box.
|
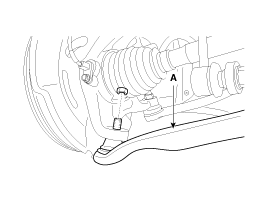
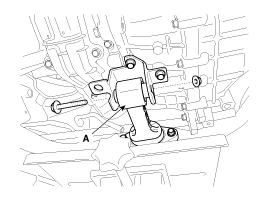
| 7. |
Loosen the bolt & nut and then saperate the roll rod stopper (A).
|
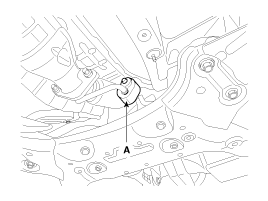
| 8. |
Disconnect the muffler rubber hanger (A).
|
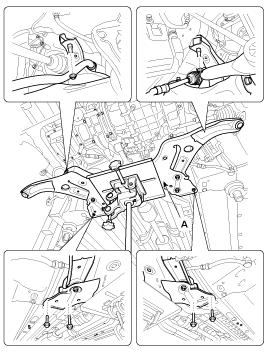
| 9. |
Loosen the bolts & nuts and then remove the sub frame (A).
|
| 10. |
Remove the front lower arm.
(Refer to Front Suspension System - "Front Lower Arm")
|
| 11. |
Remove the front stabilizer bar.
(Refer to Front Suspension System - "Front Stabilizer Bar")
|
| 12. |
Remove the steering gearbox.
(Refer to Steering System - "Steering Gearbox")
|
| 13. |
Installation is the reverse of removal.
|
| 14. |
Check the front alignment.
(Refer to Front Suspension System - "Front Alignment")
|
 Front Stabilizer Link Replacement
1.
Loosen the wheel nuts slightly.
Raise the vehicle, and make sure it is securely supported.
2.
Remove the front wheel and tire (A ...

See also:
Positive Crankcase Ventilation (PCV) Valve Removal
1.
Disconnect the vapor hose (A).
2.
Remove the PCV valve (B).
...
Front Pillar Trim Replacement
ŌĆó
Put on gloves to protect your hands.
...
Failure Diagnosis
1.
In principle, ESC and TCS controls are prohibited in case of ABS
failure.
2.
When ESC or TCS fails, only the failed system control is pr ...
Categories
- Home
- Kia Forte BD 2019-2026 Owners Manual
- Kia Forte BD 2019-2026 Service Manual
- First Generation
- Second generation
- Kia Forte TD 2014-2018 Owners Manual
- Kia Forte TD 2014-2018 Service Manual

Copyright ® www.kifomanual.com 2014-2026