
 Kia Forte: Heater Unit Replacement
Second generation YD (2014-2018) / Kia Forte TD 2014-2018 Service Manual / Heating,Ventilation, Air Conditioning / Heater / Heater Unit Replacement
| 1. |
Disconnect the negative (-) battery terminal.
|
| 2. |
Recover the refrigerant with a recovery/ recycling/ charging station.
|
| 3. |
When the engine is cool, drain the engine coolant from the radiator.
(Refer to Engine Mechanical System - "Coolant")
|
| 4. |
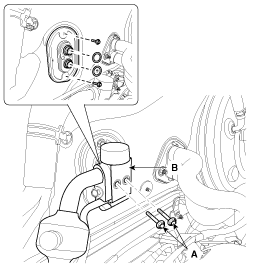
Remove the bolts (A) and the expansion valve (B) from the evaporator
core.
|

| 5. |
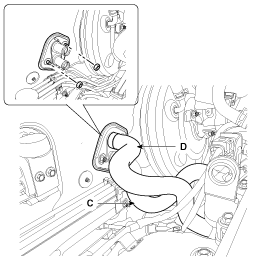
Disconnect the inlet (C) and outlet (D) heater hoses from the
heater unit.
|
| 6. |
Remove the cowl top cover.
(Refer to Body - "Cowl Top Cover")
|
| 7. |
Remove the front wiper motor.
(Refer to Body Electrical System - "Front Wiper Motor")
|
| 8. |
Remove the front seat assembly.
(Refer to Body - "Front Seat Assembly")
|
| 9. |
Remove the front pillar trim.
(Refer to Body - "Front Pillar Trim")
|
| 10. |
Remove the floor console assembly.
(Refer to Body - "Floor Console Assembly")
|
| 11. |
Remove the shift lever assembly.
(Refer to Manual Transaxle System - "Shift Lever")
(Refer to Automatic Transaxle Control System - "Shift Lever")
|
| 12. |
Remove the cowl side trim.
(Refer to Body - "Cowl Side Trim")
|
| 13. |
Remove both sides of the crash pad side cover.
(Refer to Body - "Crash Pad Side Cover")
|
| 14. |
Remove the crash pad lower panel.
(Refer to Body - "Crash Pad Lower Panel")
|
| 15. |
Remove the steering wheel and column.
(Refer to Steering System - "Steering Column and Shaft")
|
| 16. |
Remove the glove box housing.
(Refer to Body - "Glove Box Housing")
|
| 17. |
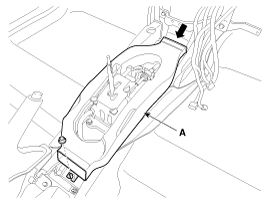
After loosening the mounting nut, remove the console duct (A).
|
| 18. |
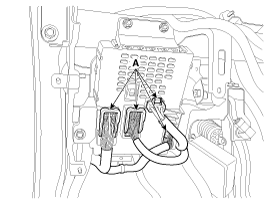
Disconnect the passenger compartment junction box connectors (A).
|
| 19. |
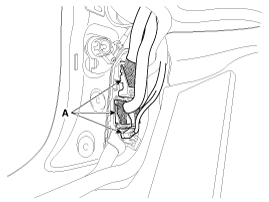
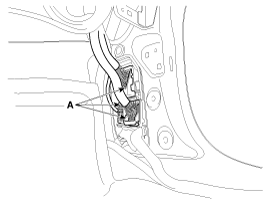
Disconnect the multi box connectors (A).
[Driver's side]
[Passenger's side]
|
| 20. |
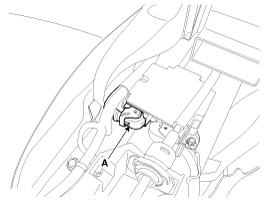
Disconnect the airbag control module (SRSCM) connector (A).
|
| 21. |
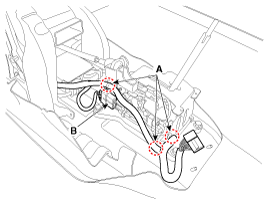
Remove the wiring mounting clips (A).
|
| 22. |
Disconnect the shift lever connector (B).
|
| 23. |
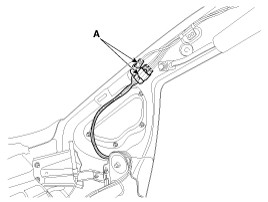
Disconnect the connectors (A) and the mounting clips in the front
pillar.
[Passenger's side]
|
| 24. |
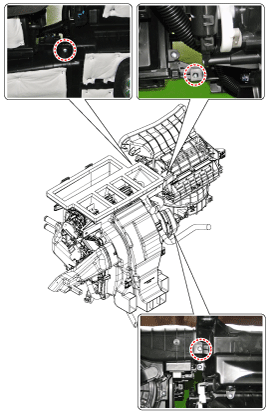
Loosen the mounting bolts.
|
| 25. |
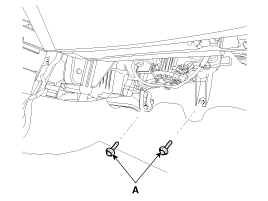
Looseen the cowl cross member assembly mounting bolts (A).
|
| 26. |
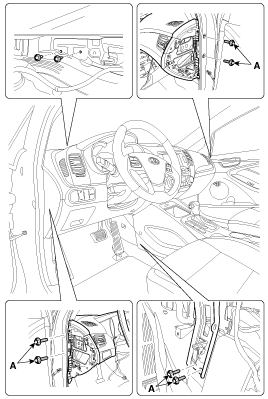
Loosen the drain hose fixing clip under the vehicle.
|
| 27. |
Disconnect the heater and blower unit connectors.
|
| 28. |
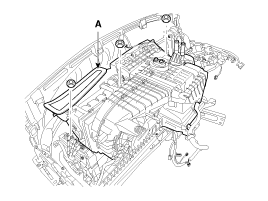
Remove the heater & blower unit (A) from the crash pad after loosening
the mounting nuts.
|
| 29. |
Separate the blower unit from the heater unit after loosening
the screws.
|
| 30. |
Install in the reverse order of removal.
|
 Heater Unit Components
1. Heater Case (Left)
2. Heater Case (Right)
3. Console Separator
4. Defog Door
5. Vent Door
6. Floor Door
7. Mix Door (Manual)
8. Mix Door (DATC-Left)
9. Mix Door ( ...
 Heater Core Replacement
1.
Disconnect the negative (-) battery terminal.
2.
Remove the heater and blower assembly.
(Refer to Heater -"Heater Unit")
...
See also:
Warning lights
✽ NOTICE - Warning lights
Make sure that all warning lights are OFF after starting the engine. If any
light is still ON, this indicates a situation that needs attention.
Air bag Warning Ligh ...
Installation
1.
Set the front tires straight-ahead before assembling the steering
wheel.
...
Parking Assist System Switch Installation
1.
Install the switchs and connect the switch connectors.
2.
Insatll the floor console assembly.
3.
Connect the ...
Categories
- Home
- Kia Forte BD 2019-2026 Owners Manual
- Kia Forte BD 2019-2026 Service Manual
- First Generation
- Second generation
- Kia Forte TD 2014-2018 Owners Manual
- Kia Forte TD 2014-2018 Service Manual

Copyright � www.kifomanual.com 2014-2026