 Kia Forte: CVVT & Camshaft Removal
Second generation YD (2014-2018) / Kia Forte TD 2014-2018 Service Manual / Engine Mechanical System / Cylinder Head Assembly / CVVT & Camshaft Removal
|

|

Timing chain cover removal is not required for this procedure.
| 1. |
Remove the cylinder head cover.
(Refer to Cylinder Head Assembly - ŌĆ£Cylinder Head CoverŌĆØ)
|
| 2. |
Set No.1 cylinder to TDC (Top dead center) on compression stroke.
|
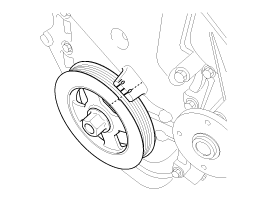
| 3. |
Remove the crankshaft damper pulley.
(Refer to Timing System - ŌĆ£Crankshaft Damper PulleyŌĆØ)
|
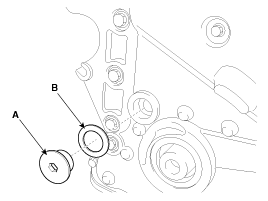
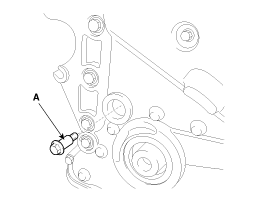
| 4. |
Remove the service plug bolt (A) with the gasket (B).
|
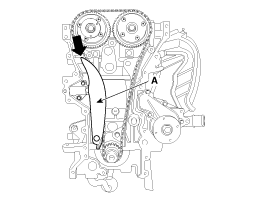
| 5. |
Remove the tensioner arm bolt (A).
|
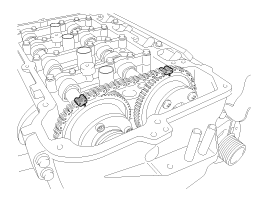
| 6. |
Push down the tensioner arm (A).
|
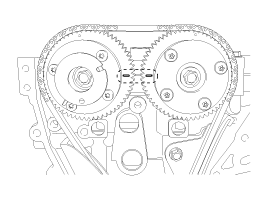
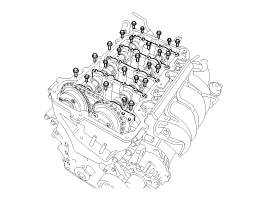
| 7. |
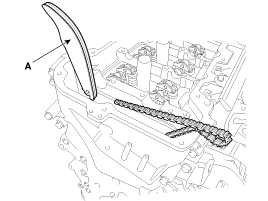
Remove the camshaft bearing caps.
|
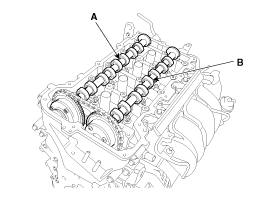
| 8. |
Remove the exhaust camshaft (A) first, then intake camshaft (B).
|
| 9. |
Remove the tensioner arm (A).
|
| 10. |
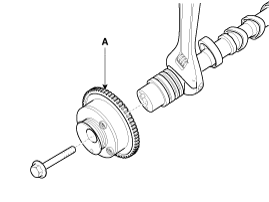
Remove the CVVT assembly (A) from the camshaft.
|
 [CVVT System Mode]
(1) Low Speed / Low Load
(2) Part Load
(3) Low Speed / High Load
(4) High Speed / High Load
...
 CVVT & Camshaft Inspection
Camshaft
1.
Inspect the cam lobes.
Using a micrometer, measure the cam lobe height.
If the cam lobe height is less than specification, replace the
camsh ...
See also:
Components
1. Power door mirror
2. Power door mirror switch
...
Condenser Replacement
1.
Recover the refrigerant with a recovery/ recycling/ charging station.
2.
Disconnect the negative (-) battery terminal.
3 ...
Tightening Torques
Items
N.m
kgf.m
lb-ft
Oil drain plug
58.9 ~ 78.5
6.0 ~ 8.0
43.4 ~ 57.8
Oil filler plug
58.9 ~ 78.5
6.0 ~ 8.0
...
Categories
- Home
- Kia Forte BD 2019-2026 Owners Manual
- Kia Forte BD 2019-2026 Service Manual
- First Generation
- Second generation
- Kia Forte TD 2014-2018 Owners Manual
- Kia Forte TD 2014-2018 Service Manual

Copyright ® www.kifomanual.com 2014-2026