 Kia Forte: Windshield defrosting and defogging
WARNING - Windshield heating
Do not use the

or

position during cooling operation in extremely humid weather to reduce the likelyhood
of fog up.
- For maximum defrosting, set the temperature control to the extreme right/hot position and the fan speed control to the highest speed.
- If warm air to the floor is desired while defrosting or defogging, set the mode to the floor-defrost position.
- Before driving, clear all snow and ice from the windshield, rear window, outside rear view mirrors, and all side windows.
- Clear all snow and ice from the hood and air inlet in the cowl grill to improve heater and defroster efficiency and to reduce the probability of fogging up the inside of the windshield.
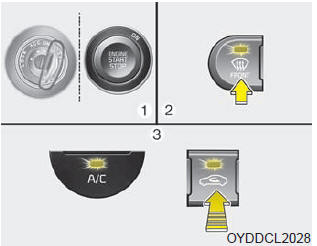
Manual climate control system
To defog inside windshield
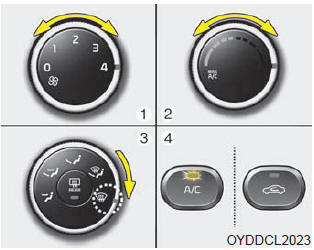
1. Select any fan speed except "0" position.
2. Select desired temperature.
3. Select the

or

position.
4. The outside (fresh) air will be selected automatically.
If the outside (fresh) air position is not selected automatically, press the corresponding button manually.
To defrost outside windshield
1. Set the fan speed to the highest (extreme right) position.
2. Set the temperature to the extreme hot position.
3. Select the

position.
4. The outside (fresh) air will be selected automatically.
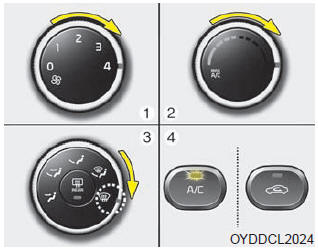
Automatic climate control system
To defog inside windshield
1. Select desired fan speed.
2. Select desired temperature.
3. Press the defroster button (
 ).
).
4. The outside (fresh) air position will be selected automatically.
If the outside (fresh) air position is not selected automatically, adjust the corresponding button manually.
If the

position is selected, lower fan speed is adjusted to a higher fan speed.
To defrost outside windshield
1. Set the fan speed to the highest position.
2. Set the temperature to the extreme hot (HI) position.
3. Press the defroster button (
 ).
).
4. The outside (fresh) air position will be selected automatically.
If the

position is selected, lower fan speed is adjusted to a higher fan speed.
Defogging Logic
To reduce the probability of fogging up inside of the windshield, the air intake
or air conditioning are controlled automatically according to certain conditions
such as

or

position. Logic can be disabled and enabled by doing following :
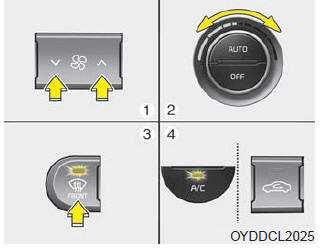
Manual climate control system

1. Turn the ignition switch to the ON position.
2. Turn the mode selection knob to the defrost position (
 ).
).
3. Push the air intake control button at least 5 times within 3 seconds.
The indicator light in the air intake control button will blink 3 times with 0.5 second of interval. It indicates that the defogging logic is canceled or returned to the programmed status.
If the battery has been discharged or disconnected, it resets to the defog logic status.
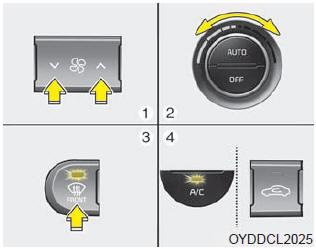
Automatic climate control system
1. Turn the ignition switch to the ON position.
2. Select the defroster position before pressing the defroster button (
 ).
).
3. While pressing the air conditioning button (A/C), press the air intake control
button (
 )
)
at least 5 times within 3 seconds.
The indicator on the air intake button blinks 3 times with 0.5 seconds of interval. It indicates that the defogging logic is canceled or returned to the programmed status.
If the battery has been discharged or disconnected, it resets to the defog logic status.
Auto defogging system (Only for automatic climate control system, if equipped)
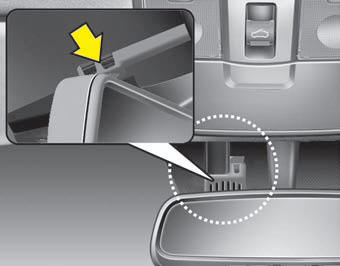
Auto defogging reduces the probability of fogging up the inside of the windshield by automatically sensing the moisture inside the windshield.
The auto defogging system operates when the heater or air conditioning is on.

This indicator illuminates when the auto defogging system senses the moisture inside the windshield and operates.
If more moisture is in the vehicle, higher steps operate as follows. For example, if auto defogging does not defog inside the windshield at step 1 Outside air position, it tries to defog again at step 2 Blowing air toward the windshield.
Step 1 : Outside air position
Step 2 : Blowing air toward the windshield
Step 3 : Increasing air flow toward the windshield
Step 4 : Operating the air conditioning
Step 5 : Maximizing the air conditioning
If your vehicle is equipped with the auto defogging system, it is automatically activated when the conditions are met. However, if you would like to cancel the auto defogging system, press the front defroster button 4 times within 2 seconds while pressing the AUTO button. The indicator will blink 3 times to notify you that the system is cancelled. To use the auto defogging system again, follow the procedures mentioned above.
If the battery has been disconnected or discharged, it resets to the auto defogging status.
✽ NOTICE
- When the air conditioning is turned on by Auto defogging system, if you try to turn off the air conditioning, the indicator will blink 3 times and the air conditioning will not be turned off.
- For efficiency, do not select recirculated air position while Auto defogging system is operating.
CAUTION
Do not remove the sensor cover located on the upper end of the driver side windshield glass. Damage to the system parts could occur and may not be covered by your vehicle warranty.

 Storage compartment
These compartments can be used to store small items.
To avoid possible theft, do not leave valuables in the storage compartment. Always
keep the storage compartment covers closed while driving.
WAR ...
See also:
Alternator Installation
1.
Install in the reverse order of removal.
2.
Adjust the alternator belt tension after installation.
(Refer to Engine Mechanical ...
BJ Boot Replacement
1.
Remove the front driveshaft.
(Refer to Driveshaft Assembly - ŌĆ£Front DriveshaftŌĆØ)
2.
Remove the TJ joint assembly.
(Refe ...
Replacement
ŌĆó
Put on gloves to protect your hands.
...
Categories
- Home
- Kia Forte BD 2019-2026 Owners Manual
- Kia Forte BD 2019-2026 Service Manual
- First Generation
- Second generation
- Kia Forte TD 2014-2018 Owners Manual
- Kia Forte TD 2014-2018 Service Manual
