 Kia Forte: Drive Belt Inspection
Second generation YD (2014-2018) / Kia Forte TD 2014-2018 Service Manual / Engine Mechanical System / Timing System / Drive Belt Inspection
| 1. |
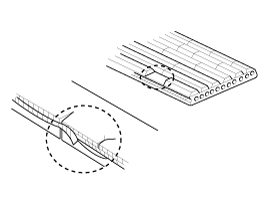
Check belt for maintenance and abnormal wear of V-ribbed part.
Replace if necessary.
|
| 2. |
Visually check the belt for excessive wear, frayed cords etc.
If any defect has been found, replace the drive belt.
|
Drive belt tension measurement and adjustment
| Belt tension measurement |
Measure the belt tension using a mechanical tension gauge or a sonic tension
meter.
Belt tension
New belt:
637.4 ~ 735.5 N (65 ~ 75 kgf, 143.3 ~ 165.3 lbf)
Used belt:
441.3 ~ 539.4 N (45 ~ 55 kgf, 99.2 ~ 121.3 lbf)
|
|
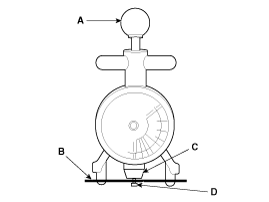
| Using a mechanical tension gauge |
| 1. |
While pressing the handle (A) of the gauge, insert the belt (B)
between pulley and pulley (or idler) into the gap between spindle (C)
and hook (D).
|
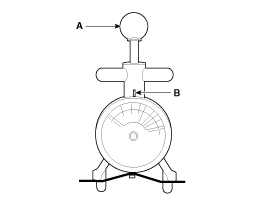
| 2. |
After releasing the handle (A), read a value on the dial pointed
by the indicator (B).
|
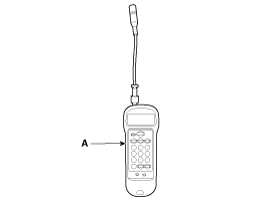
| Using a sonic tension meter |
| 1. |
Input the belt specifications into the tension meter (A).
|
||||||||||||||||||||||
| 2. |
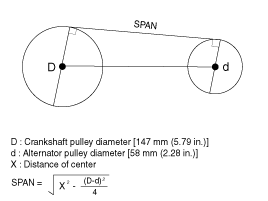
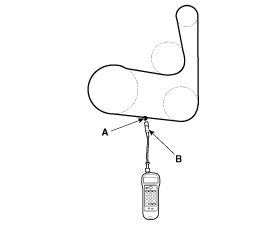
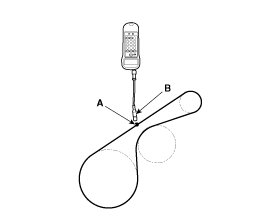
Locate the micro phone (B) close to the center of belt span (A)
and bounce the belt by finger 2~3 times. Read a value on the display.
[With A/C]
[Without A/C]
|
| If adjustment is necessary: |
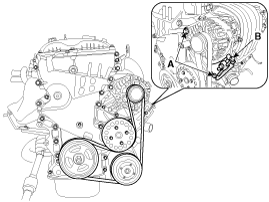
| 1. |
Loosen the mounting bolts (A).
|
| 2. |
Tighten the adjusting bolt (B) counterclockwise in loose tension;
fasten the bolt clockwise in high tension.
|
| 3. |
Recheck tension of the belt.
|
| 4. |
After adjusting tension, tighten the mounting bolts.
|
 Drive Belt Removal
1.
Remove the drive belt.
(1)
Loosen the alternator mounting bolts (A).
(2)
Loo ...
 Drive Belt Installation
1.
Install the drive belt.
(1)
Install the drive belt (C).
(2)
Adjust the tension by t ...
See also:
Rear Door Inside Handle Replacement
(4Door, 5Door)
1.
Remove the rear door trim.
(Refer to Rear Door - "Rear Door Trim")
2.
After loosening the moun ...
Input Speed Sensor Installation
1.
Installation is the reverse of removal.
After replacement or reinstallation procedure of ...
Components
...
Copyright © www.kifomanual.com 2014-2025


