 Kia Forte: Outside lamp
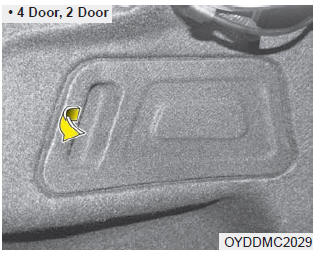
4 Door, 2Door
1. Open the trunk lid.
2. Remove the service cover by pulling out the service cover.

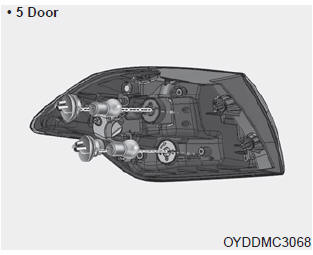
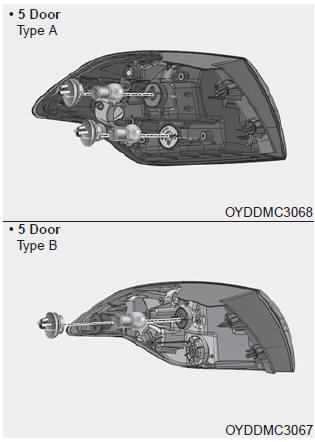
5 Door
1. Turn off the engine.
2. Open the tailgate.
3. Loosen the light assembly retaining screws with a cross-tip screwdriver.
4. Remove the rear combination light assembly from the body of the vehicle.
5. Remove the socket from the assembly by turning the socket counterclockwise until the tabs on the socket align with the slots on the assembly.
6. Remove the bulb from the socket by pressing it in and rotating it counterclockwise until the tabs on the bulb align with the slots in the socket. Pull the bulb out of the socket.
7. Insert a new bulb by inserting it into the socket and rotating it until it locks into place.
8. Install the socket in the assembly by aligning the tabs on the socket with the slots in the assembly. Push the socket into the assembly and turn the socket clockwise.
9. Reinstall the light assembly to the body of the vehicle.
Stop/Tail lamp and turn signal lamp
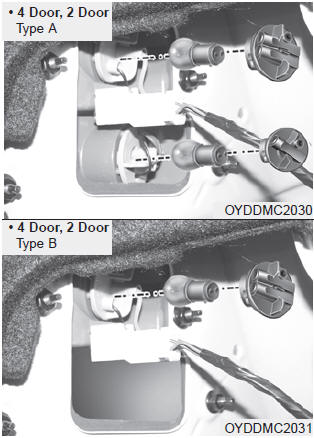
1. Remove the socket from the assembly by turning the socket counterclockwise until the tabs on the socket align with the slots on the assembly.
2. Remove the bulb from the socket by pressing it in and rotating it counterclockwise until the tabs on the bulb align with the slots in the socket. Pull the bulb out of the socket.
3. Insert a new bulb by inserting it into the socket and rotating it until it locks into place.
4. Install the socket in the assembly by aligning the tabs on the socket with the slots in the assembly. Push the socket into the assembly and turn the socket clockwise.
5. Install the service cover by putting it into the service hole.
Stop and tail light (LED type)
If the light does not operate, we recommend that the system be checked by an authorized Kia dealer.
Inside lamp
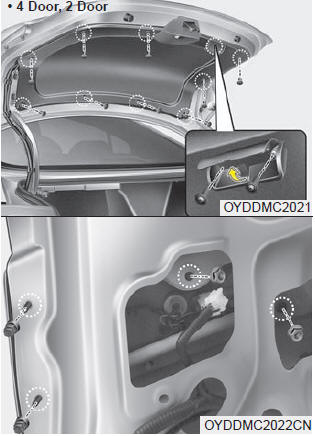
4 Door, 2 Door
1. Open the trunk.
2. Loosen the retaining screw of the trunk lid cover and then remove the cover.
3. Disconnect the connector and then remove the nuts by turning the nuts counter clockwise.
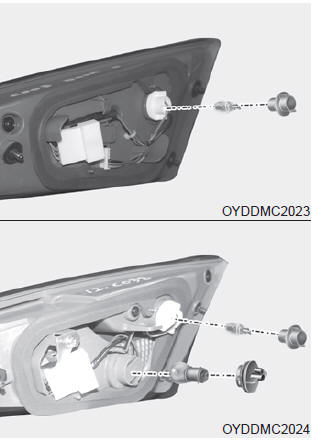
4 Door, 2 Door
 Light bulbs
WARNING - Lights
Prior to working on the light, firmly apply the parking brake, ensure that
the ignition switch is turned to the ŌĆ£LOCKŌĆØposition and turn off the lights to avoid
burning your fin ...
 Back up lamp, Rear fog lamp
1. Take the lamp assembly out.
2. Remove the socket from the assembly by turning the socket counterclockwise
until the tabs on the socket align with the slots on the assembly.
3. Remove the bulb by ...
See also:
Components
1. Reverse hose
2. Master cylinder
3. Ignition lock switch
4. Clutch switch
5. Clutch arm assembly
6. Pedal pad
...
Component Location
[Engine Room]
1. Receiver Drier
2. Condenser
3. Ambient Temperature Sensor
4. Compressor
5. Discharge Hose
6. Suction & Liquid Tube Assembly
7. Servic ...
IMS Power Seat Control Inspection
1.
Disconnect the IMS control switch connector.
2.
With the power IMS control switch in each position, make sure
that continuity ex ...
Categories
- Home
- Kia Forte BD 2019-2026 Owners Manual
- Kia Forte BD 2019-2026 Service Manual
- First Generation
- Second generation
- Kia Forte TD 2014-2018 Owners Manual
- Kia Forte TD 2014-2018 Service Manual
