 Kia Forte: Removal
| 1. |
Engine cover.
(Refer to Engine Mechanical System - "Engine cover")
|
| 2. |
Air cleaner assembly and air duct.
(Refer to Engine Mechanical System - "Air cleaner")
|
| 3. |
Battery and battery tray.
(Refer to Engine Electrical System - "Battery")
|
| 4. |
Remove the ECM (Engine Control Module).
(Refer to Fuel System - "Engine Control Module (ECM)")
|
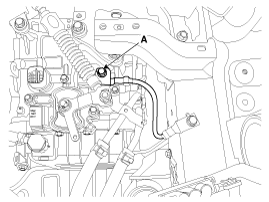
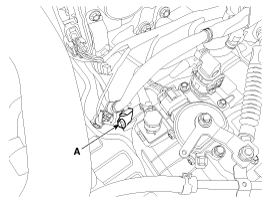
| 5. |
Remove the ground line after removing the bolt (A).
|
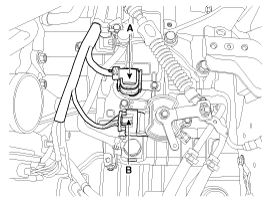
| 6. |
Dissconnect the solenoid valve connector (A) and inhibitor switch
connector (B).
|
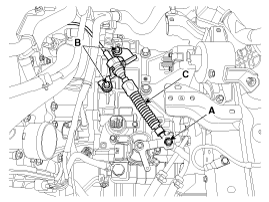
| 7. |
Remove the control cable (C) after removing the nut (A) and the
bolt (B).
|
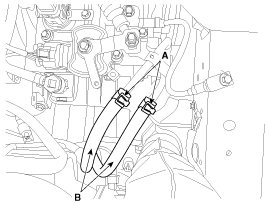
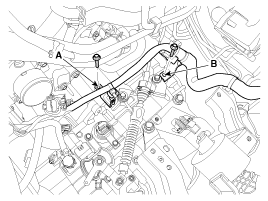
| 8. |
Disconnect the hose (B) after removing the automatic transaxle
fluid cooler hose clamp (A).
|
| 9. |
Remove the wiring mounting bolt (A).
|
| 10. |
Remove the solenoid valve connector and inhibitor switch connector
wiring mounting bracket (A)and(B).
|
| 11. |
Remove the cowl top cover.(Refer to Body - "Cowl Top Cover")
|
| 12. |
Assemble the engine support fixture.(Refer to Special Service
Tools-"Engine support fixture assembly drawing")
|
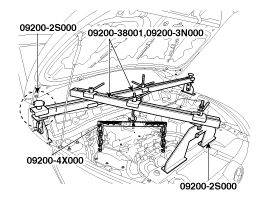
| 13. |
Using the engine support fixture (beam No.: 09200-38001 or 09200-3N000,
supporter No.: 09200-2S000, adapter No.: 09200-4X000), hold the engine
and transaxle assembly safely.
|
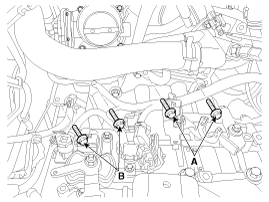
| 14. |
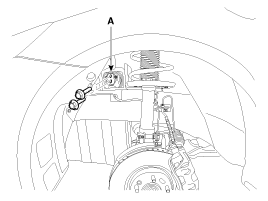
Remove the automatic transaxle upper mounting bolt (A-2ea) and
the starter motor mounting bolt (B-2ea).
|
| 15. |
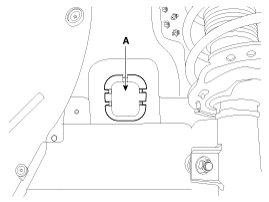
Remove the automatic transaxle mounting bracket cover (A).
|
| 16. |
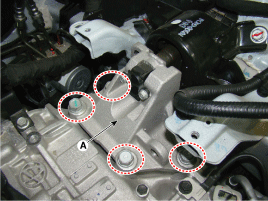
Remove the automatic transaxle mounting bracket bolts (A).
|
| 17. |
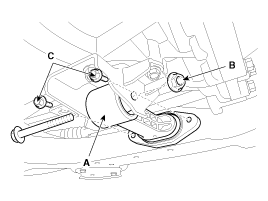
Remove the automatic transaxle mounting support bracket (A).
|
| 18. |
Lift the vehicle with a jack.
|
| 19. |
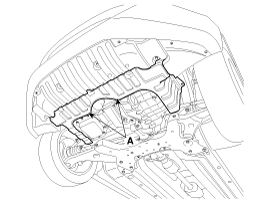
Remove the under cover (A).
|
| 20. |
Remove the roll stopper (A).
|
| 21. |
Remove the drive shaft assembly.
(Refer to Driveshaft and Axle - "Front Driveshaft")
|
| 22. |
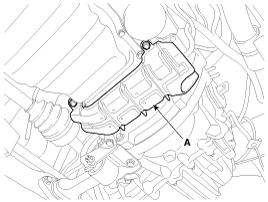
Remove the air guide bracket(A).
|
| 23. |
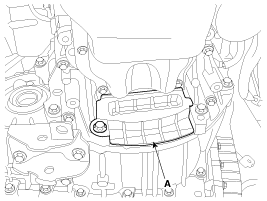
Remove the dust cover (A).
|
| 24. |
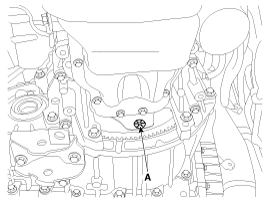
Remove the torque converter mounting bolts(A) with rotating the
crankshaft.
|
| 25. |
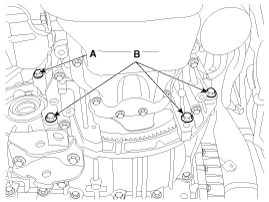
Remove the automatic transaxle with a jack after removing the
mounting bolt (A-1ea, B-3ea).
|
 Components Location
1. Converter housing
2. Automatic transaxle upper mounting bolt
3. Shift cable bracket
4. Manual control lever
5. Rear cover
6. Oil cooler tube
7. Oil level plug
8. Val ...
 Installation
1.
Install in the reverse order of removal.
If the oil seal on the transaxle case side is da ...
See also:
Rear Door Side Weatherstrip Replacement
(4Door, 5Door)
1.
Loosen the rear door checker (B) mounting bolt.
Tightening torque:
16.7 ~ 25.5 N.m (1.7 ~ 2.6 kgf.m,12.3 ~ ...
Description
The immobilizer system will disable the vehicle unless the proper ignition
key is used, in addition to the currently available anti-theft systems such
as car alarms, the immobilizer system ai ...
Fuel Pump Motor Removal
1.
Remove the fuel pump (Refer to “Fuel Pump” in this group).
2.
Disconnect the electric pump wiring connector (A) and the fuel
sender conn ...
Copyright © www.kifomanual.com 2014-2025

