
 Kia Forte: Torque Converter Control Solenoid Valve (T/CON_VFS) Removal
Second generation YD (2014-2018) / Kia Forte TD 2014-2018 Service Manual / Automatic Transaxle System / Automatic Transaxle Control System / Torque Converter Control Solenoid Valve (T/CON_VFS) Removal
| 1. |
Disconnect the negative (-) battery cable.
|
| 2. |
Remove the air cleaner assembly and air duct.
(Refer to Engine Mechanical System - "Air cleaner")
|
| 3. |
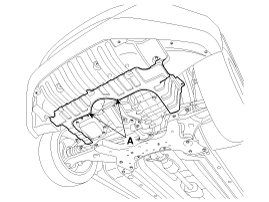
Remove the under cover (A).
|
| 4. |
Replace new gasket and the plug after draining the automatic transaxle
fluid by removing the drain plug.
(Refer to Hydraulic System - "Fluid")
|
| 5. |
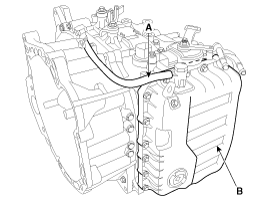
Remove the air breeder hose (A).
|
| 6. |
Remove the valve body cover (B).
|
| 7. |
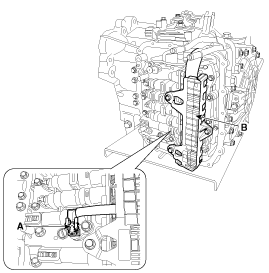
Remove the bolt (3ea) after disconnecting the solenoid valve connector
(B) and the oil temperature sensor connector (A).
|
| 8. |
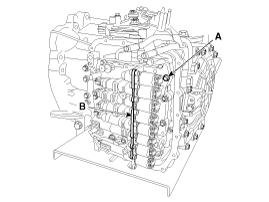
Remove the solenoid valve support bracket (B) and the valve body
mounting bolt (A-1ea).
|
| 9. |
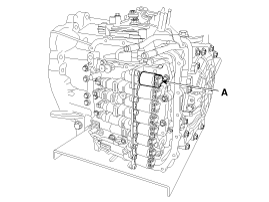
Remove the torque converter control solenoid valve (A).
|
 Torque Converter Control Solenoid Valve (T/CON_VFS) Inspection
1.
Turn ignition switch OFF.
2.
Disconnect the Solenoid valve connector.
3.
Measure resistance between sensor ...
 Torque Converter Control Solenoid Valve (T/CON_VFS) Installation
1.
Install in the reverse order of removal.
•
Adding Automat ...
See also:
Variable Intake Solenoid (VIS) Valve Removal
1.
Turn the ignition switch OFF and disconnect the battery negative
(-) cable.
2.
Disconnect the variable intake solenoid valve connector ( ...
Troubleshooting
Symption
Suspect area
Remedy
Engine misfire with abnormal internal lower engine noises
•
Worn crankshaft bearings
...
Function
Function
Description
Input
Output
Front Washer & Wiper
-
IGN2 On & WasherS/W On and Off
...
Categories
- Home
- Kia Forte BD 2019-2026 Owners Manual
- Kia Forte BD 2019-2026 Service Manual
- First Generation
- Second generation
- Kia Forte TD 2014-2018 Owners Manual
- Kia Forte TD 2014-2018 Service Manual

Copyright � www.kifomanual.com 2014-2026