 Kia Forte: Audio Unit Removal
Second generation YD (2014-2018) / Kia Forte TD 2014-2018 Service Manual / Body Electrical System / Audio / Audio Unit Removal
|

| 1. |
Disconncet the negative (-) battery terminal.
|
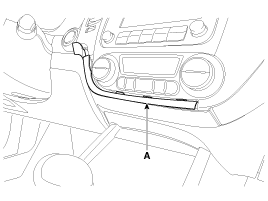
| 2. |
Using a screwdriver or remover, remove the center fascia garnish
(A).
|
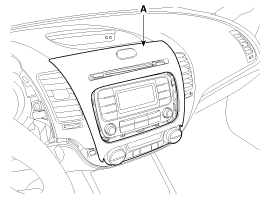
| 3. |
Using a screwdriver or remover, remove the center fascia panel
(A).
|
| 4. |
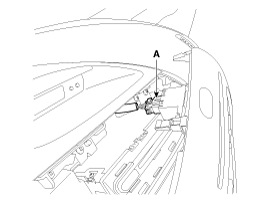
Remove the center fascia panel after disconnecting the hazard
switch connector (A).
|
| 5. |
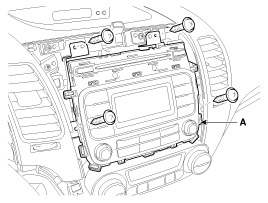
Remove the audio head unit (A) after loosening the mounting screws
(4EA).
|
| 6. |
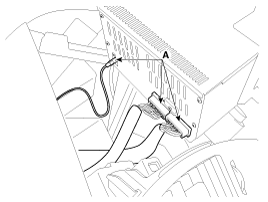
Disconnect the connectors and cable (A) from the audio head unit.
|
 Audio Unit Components
Connector Pin Information
No.
Connector A
Connector B
1
Rear left speaker (+)
-
2
Front left speaker (+)
-
...
 Audio Unit Installation
1.
Connect the audio unit connectors and cables.
2.
Install the audio unit.
3.
Install the center fascia panel ...
See also:
Crankshaft Position Sensor (CKPS) Waveform
...
Fluid Components Location
1. Injection hole(eyebolt)
2. Oil level plug
3. Oil drain plug
...
Replacement
1.
Remove the air cleaner assembly.
(Refer to Engine Mechanical System - "Air Cleaner")
2.
Remove the battery and battery tray ...
Categories
- Home
- Kia Forte BD 2019-2026 Owners Manual
- Kia Forte BD 2019-2026 Service Manual
- First Generation
- Second generation
- Kia Forte TD 2014-2018 Owners Manual
- Kia Forte TD 2014-2018 Service Manual

Copyright ® www.kifomanual.com 2014-2026