 Kia Forte: In-car Sensor (DATC only) Replacement
Second generation YD (2014-2018) / Kia Forte TD 2014-2018 Service Manual / Heating,Ventilation, Air Conditioning / Air Conditioning System / In-car Sensor (DATC only) Replacement
| 1. |
Disconnect the negative (-) battery terminal.
|
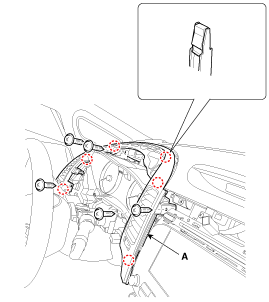
| 2. |
Remove the center fascia panel.
(Refer to Body - "Center Fascia Panel")
|
| 3. |
Remove the cluster fascia panel.
(Refer to Body - "Cluster Fascia Panel")
|
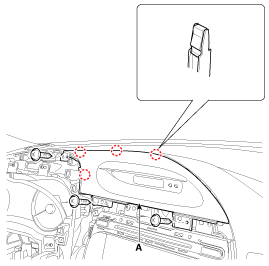
| 4. |
After loosening the mounting screws, remove the drive airvent
duct assembly (A).
|
| 5. |
After loosening the mounting screws, remove the clock fascia panel
(A).
|
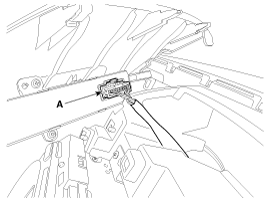
| 6. |
Disconnect the clock switch connector (A).
|
| 7. |
After loosening the mounting screws, then remove the center airvent
duct assembly [RH] (A).
|
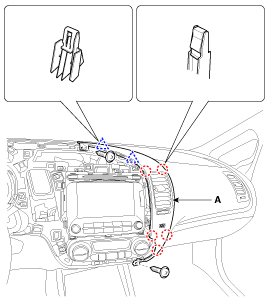
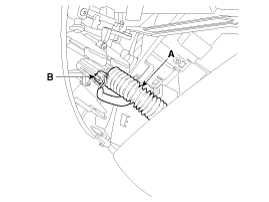
| 8. |
Remove the in-car hose (A).
|
| 9. |
Disconnect the in-car sensor connector (B).
|
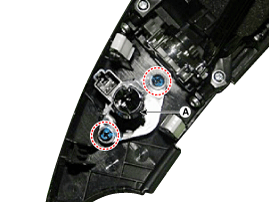
| 10. |
Loosen the mounting screws and then remove the in-car sensor (A)
located in the back side of the center airvent duct assembly [RH].
|
| 11. |
Install in the reverse order of removal.
|
 In-car Sensor (DATC only) Inspection
1.
Turn the ignition switch ON.
2.
Blow air with changing temperature into the in-car sensor air
inlet. Measure the sensor resistance betwe ...
 Photo Sensor Description
The photo sensor is located at the center of the defrost nozzle.
The photo sensor contains a photovoltaic (sensitive to sunlight) diode.
The solar radiation received by its light receiving p ...
See also:
Installation
1.
Install the BCM unit.
2.
Install the center lower cover.
3.
Install the floor console assembly.
...
Brake Line
Components
...
Tightening Torque
Part tightened
N.m
Kgf.m
lbf.ft
Condenser - Discharge hose
7.8~11.7
0.8~1.2
5.7~8.6
Condenser - Liquid tube
Comp ...
Categories
- Home
- Kia Forte BD 2019-2026 Owners Manual
- Kia Forte BD 2019-2026 Service Manual
- First Generation
- Second generation
- Kia Forte TD 2014-2018 Owners Manual
- Kia Forte TD 2014-2018 Service Manual

Copyright ® www.kifomanual.com 2014-2026