Kia Forte: Oil Pan Installation - Lubrication System - Engine Mechanical System - Kia Forte TD 2014-2018 Service ManualKia Forte: Oil Pan Installation

Second generation YD (2014-2018) / Kia Forte TD 2014-2018 Service Manual / Engine Mechanical System / Lubrication System / Oil Pan Installation
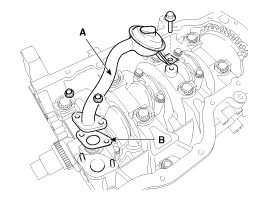
1.
Install the oil screen (A) with a new gasket (B).
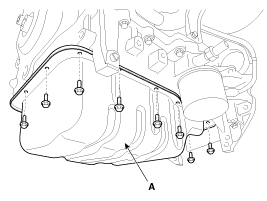
Tightening torque
Bolt :
19.6 ~ 26.5 N.m (2.0 ~ 2.7 kgf.m, 14.5 ~ 19.5 lb-ft)
Nuts :
11.8 ~ 13.7 N.m (1.2 ~ 1.4 kgf.m, 8.7 ~ 10.1 lb-ft)

2.
Install the oil pan.
(1)
Using a gasket scraper, remove all the old packing material from the gasket surfaces.
(2)
The sealant locations on the oil pan and the lower crankcase must be free of harmful foreign materials, oil, dust and moisture.
Spraying cleaner on the surface and wiping with a clean duster.
(3)
After applying liquid sealant on the oil pan, assemble it within 5 minutes after sealant was applied. Continuous bead of sealant should be applied to prevent any path of oil leakage.

Bead width
Whole section :4.0 ~ 5.0 mm (0.16 ~ 0.20 in.)
Section A : 1.5 ~ 2.5 mm (0.06 ~ 0.10 in.)
Sealant: Threebond 1217H (Hyundai Gray RTV)

  
When applying sealant gasket, sealant must not be protruded into the inside of oil pan.
If the sealant is applied to the bottom surface of the lower crankcase, it should be the same position as the oil pan.
(4)
Install the oil pan (A). Uniformly tighten the bolts in several passes.

Tightening torque:
9.8 ~ 11.8 N.m (1.0 ~ 1.2 kgf.m, 7.2 ~ 8.7 lb-ft)

  
After assembly, wait at least 30 minutes before filling the engine with oil.
  
Always use a new drain plug gasket.
3.
Refill engine with engine oil.
Oil Pan Removal
1. Remove the under covers. 2. Drain engine oil. 3. 
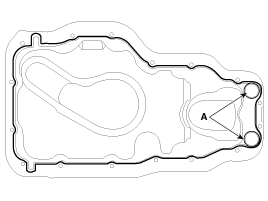
Remove the oil pan (A). (1) ...

Oil Pump Components
1. Inner roter 2. Outer roter 3. Oil pump cover 4. Relief plunger 5. Relief spring 6. Relief plug 7. O-ring (suction side) 8. O-ring (discharge side) ...

See also:

Auto Light Sensor Inspection
In the state of IGN1 ON, when multifunction switch module detects auto light switch on, tail lamp relay output and head lamp low relay output are controlled according to auto light sensor' ...

Measurement Method
Projected Dimensions 1. These are the dimensions measured when the measurement points are projected into the reference plane, and are the reference dimensions ...

Seat Heater Switch Installation
Driver/Passenger Seat 1. Install the switchs and connect the switch connectors. 2. Insatll the floor console assembly. ...

Copyright www.kifomanual.com 2014-2026