 Kia Forte: Cylinder Head Cover Removal
Second generation YD (2014-2018) / Kia Forte TD 2014-2018 Service Manual / Engine Mechanical System / Cylinder Head Assembly / Cylinder Head Cover Removal
|

Mark all wiring and hoses to avoid misconnection.
|

| 1. |
Remove the engine cover.
|
| 2. |
Disconnect the battery negative terminal.
|
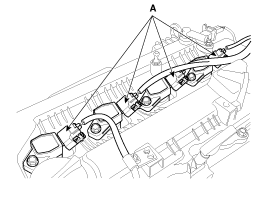
| 3. |
Disconnect the wiring connectors and harness clamps, and then
remove the wiring and protectors from the cylinder head and the intake
manifold.
|

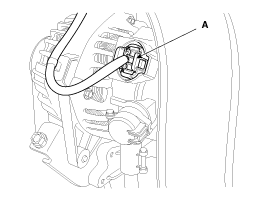
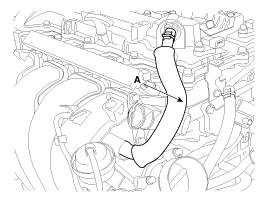
| 4. |
Disconnect the positive crankcase ventilation (PCV) hose (A).
|
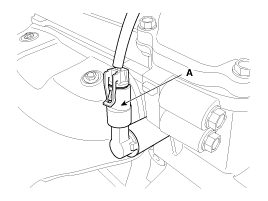
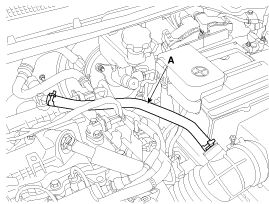
| 5. |
Disconnect the breather hose (A).
|
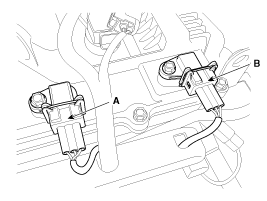
| 6. |
Remove the ignition coils.
(Refer to Engine Electrical System - ŌĆ£Ignition CoilŌĆØ)
|
| 7. |
Remove the engine oil level gauge.
(Refer to Lubrication System - ŌĆ£Oil Level Gauge & PipeŌĆØ)
|
| 8. |
Remove the cylinder head cover (A).
|

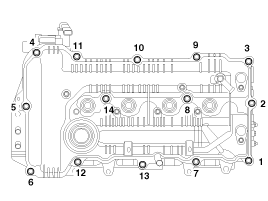
 Cylinder Head Cover Components
1. Cylinder head cover
2. Cylinder head cover gasket
...
 Cylinder Head Cover Installation
1.
Install cylinder head cover.
(1)
The hardening sealant located on the cylinder head cover
and the gap between the timing chain co ...
See also:
System Block Diagram
Component Parts And Function Outline
Component part
Function
Vehicle-speed sensor
Converts vehicle speed to pulse.
ECM
Receives signals fr ...
Center Pillar Trim Replacement
[Center pillar lower trim]
(4Door, 5Door)
ŌĆó
Put on gloves to protect your ha ...
Cylinder Head Cover Components
1. Cylinder head cover
2. Cylinder head cover gasket
...
Categories
- Home
- Kia Forte BD 2019-2026 Owners Manual
- Kia Forte BD 2019-2026 Service Manual
- First Generation
- Second generation
- Kia Forte TD 2014-2018 Owners Manual
- Kia Forte TD 2014-2018 Service Manual

Copyright ® www.kifomanual.com 2014-2026