 Kia Forte: Oil Cooler Removal and Installation
Second generation YD (2014-2018) / Kia Forte TD 2014-2018 Service Manual / Automatic Transaxle System / Hydraulic System / Oil Cooler Removal and Installation
| 1. |
Remove the cooling fan.
(Refer to Cooling System - "Cooling Fan")
|
| 2. |
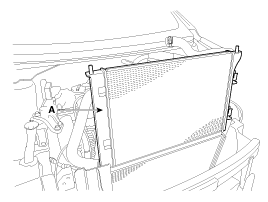
Remove the radiator upper hose (A).
|
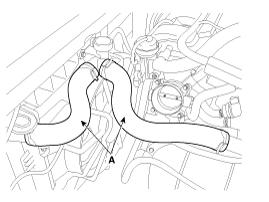
| 3. |
Remove the radiator lower hose (B).
|
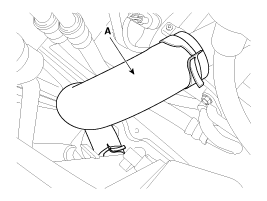

| 4. |
Remove the filler neck assembly (A).
|
| 5. |
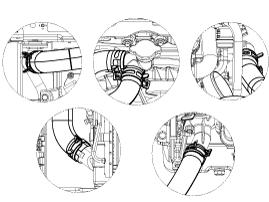
Disconnect the ATF cooler hoses.
(Refer to Automatic Transaxle System - "Automatic Transaxle")
|
| 6. |
Remove the front bumper cover.
(Refer to Body - "Front Bumper")
|
| 7. |
Remove the head lamps.
(Refer to Body Electrical System - "Head Lamps")
|
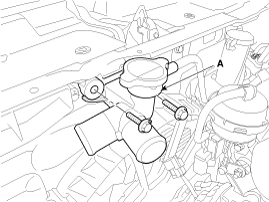
| 8. |
Remove the radiator upper bracket (A).
|
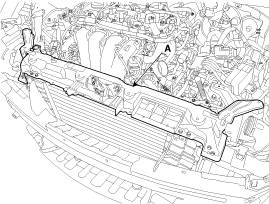
| 9. |
Remove the A/C condenser (A) from the radiator assembly and then
lift up the radiator assembly.
|
| 10. |
Installation is reverse order of removal.
|
| 11. |
Fill with engine coolant.
(Refer to Cooling System - "Coolant").
|
| 12. |
Start engine and check for leaks.
|
| 13. |
Recheck engine coolant level.
|
 Oil Cooler Components
1. Radiator
2. Radiator upper mounting bracket
3. Lower mounting insulator
4. Radiator upper hose
5. Filler neck assembly
6. Radiator lower hose
7. Clamp
...
 Oil Cooler Inspection
Radiator Cap Testing
1.
Remove the radiator cap, wet its seal with engine coolant, and
then install it on a pressure tester.
2.
...
See also:
Storage compartment
These compartments can be used to store small items.
To avoid possible theft, do not leave valuables in the storage compartment. Always
keep the storage compartment covers closed while driving.
WAR ...
Front Seat Shield Inner Cover Replacement
ŌĆó
Put on gloves to protect your hands.
...
Installation
ŌĆó
Install the concentric slave cylinder bolts. Not to be
bent or twisted, Tighten them ...
Categories
- Home
- Kia Forte BD 2019-2026 Owners Manual
- Kia Forte BD 2019-2026 Service Manual
- First Generation
- Second generation
- Kia Forte TD 2014-2018 Owners Manual
- Kia Forte TD 2014-2018 Service Manual

Copyright ® www.kifomanual.com 2014-2026