 Kia Forte: Troubleshooting
Second generation YD (2014-2018) / Kia Forte TD 2014-2018 Service Manual / Body Electrical System / Lighting System / Troubleshooting
| 1. |
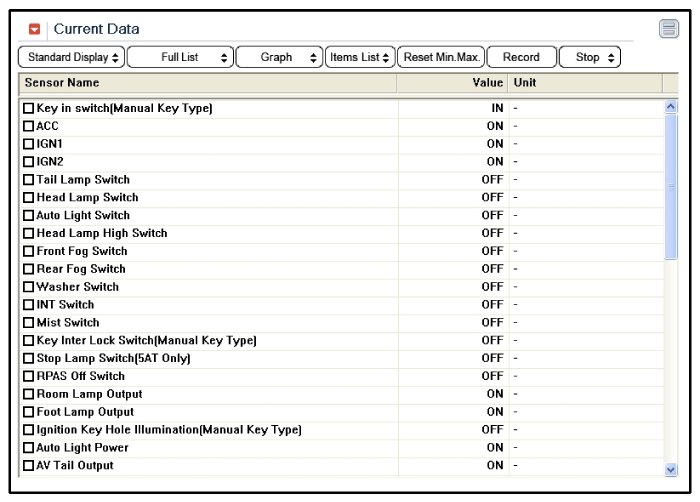
The lamp switch inputs can be checked using the GDS.
|
| 2. |
To check the input value of lamp switch, select option "Body Control
Module".
|
| 3. |
To consult the present input/output value of BCM, "Current DATA".
It provides information of BCM input/output conditions of power supply,
turn signal/brake lamp, headlamp, door, locks, outside mirror, wiper,
auto-light and transmitters etc.
|
| 4. |
To check the input value of lamp switch in force mode, select
option "Actuation Test".
|

| Symptom |
Possible cause |
Remedy |
| One lamp does not light (all exterior) |
Bulb burned out |
Replace bulb |
| Socket, wiring or ground faulty |
Repair if necessary |
|
| Head lamps do not light |
Bulb burned out |
Replace bulb |
| Ignition fuse (LOW:10A, HIGH:20A) blown |
Check for short and replace fuse |
|
| Head lamp fuse (15A) blown |
Check for short and replace fuse |
|
| Head lamp relay faulty |
Check relay |
|
| Lighting switch faulty |
Check switch |
|
| Wiring or ground faulty |
Repair if necessary |
|
| Tail lamps and license plate lamps do not light |
Bulb burned out |
Replace bulb |
| Tail lamp fuse (10A) blown |
Check for short and replace fuse |
|
| Tail lamp relay faulty |
Check relay |
|
| Lighting switch faulty |
Check switch |
|
| Wiring or ground faulty |
Repair if necessary |
|
| Stop lamps do not light |
Bulb burned out |
Replace bulb |
| Stop lamp fuse (15A) blown |
Check for short and replace fuse |
|
| Stop lamp switch faulty |
Adjust or replace switch |
|
| Wiring or ground faulty |
Repair if necessary |
|
| Stop lamps do not turn off |
Stop lamp switch faulty |
Repair or replace switch |
| Instrument lamps do not light (Tail lamps light) |
Rheostat faulty |
Check rheostat |
| Wiring or ground faulty |
Repair if necessary |
|
| Turn signal lamp does not flash on one side |
Bulb burned out |
Replace bulb |
| Turn signal switch faulty |
Check switch |
|
| Wiring or ground faulty |
Repair if necessary |
|
| Turn signal lamps do not light |
Bulb burned out |
Replace bulb |
| Turn signal lamp fuse (10A) blown |
Check for short and replace fuse |
|
| Flasher unit faulty |
Check flasher unit |
|
| Turn signal switch faulty |
Check switch |
|
| Wiring or ground faulty |
Repair if necessary |
|
| Hazard warning lamps do not light |
Bulb burned out |
Replace bulb |
| Hazard warning lamp fuse (15A) blown |
Check for short and replace fuse |
|
| Flasher unit faulty |
Check flasher unit |
|
| Hazard switch faulty |
Check switch |
|
| Wiring or ground faulty |
Repair if necessary |
|
| Flasher rate too slow or too fast |
Lamps' wattages are smaller or larger than specified |
Replace lamps |
| Flasher unit faulty |
Check flasher unit |
|
| Back up lamps do not light |
Bulb burned out |
Replace bulb |
| Back up lamp fuse (10A) blown |
Check for short and replace fuse |
|
| Back up lamp switch (M/T) faulty |
Check switch |
|
| Transaxle range switch (A/T) faulty |
Check switch |
|
| Wiring or ground faulty |
Repair if necessary |
|
| Room lamp does not light |
Bulb burned out |
Replace bulb |
| Room lamp fuse (10A) blown |
Check for short and replace fuse |
|
| Room lamp switch faulty |
Check switch |
|
| Wiring or ground faulty |
Repair if necessary |
|
| Front fog lamps do not light |
Bulb burned out |
Replace bulb |
| Front fog lamp fuse (15A) blown |
Check for short and replace fuse |
|
| Front fog lamp relay faulty |
Check relay |
|
| Front fog lamp switch faulty |
Check switch |
|
| Wiring or ground faulty |
Repair if necessary |
|
| Rear fog lamps do not light |
Rear fog lamp fuse (15A) blown |
Check for short and replace fuse |
| Rear fog lamp fuse (15A) blown |
Check for short and replace fuse |
|
| Rear fog lamp switch faulty |
Check switch |
|
| Rear fog lamp relay faulty |
Check relay |
|
| Wiring or ground faulty |
Repair if necessary |
|
| Map lamp does not light |
Bulb burned out |
Replace bulb |
| Room lamp fuse (10A) blown |
Check for short and replace fuse |
|
| Map lamp switch faulty |
Check switch |
|
| Wiring or ground faulty |
Repair if necessary |
|
| Trunk room lamp does not light |
Bulb burned out |
Replace bulb |
| Room lamp fuse (10A) blown |
Check for short and replace fuse |
|
| Trunk room lamp switch faulty |
Check switch |
|
| Wiring or ground faulty |
Repair if necessary |
 Turn Signal Lamp
Removal
1.
Remove the outside rear view mirror.
(Refer to Body - "Outside Rear View Mirror")
Installation
1.
Install the out ...
 maincat
...
See also:
Variable Charge Motion Actuator (VCMA) Circuit diagram
(M/T)
(A/T)
...
Air Ventilation Seat Unit Removal
Cushion Blower
1.
Remove the front seat assembly.
(Refer to Body - "Front Seat Assembly")
2.
Remove the cushion blower (A) ...
Power Window Motor Inspection
Front Power Window Motor Inspection
1.
Remove the front door trim.
(Refer to Body - "Front Door Trim")
2.
Disconnect the c ...
Categories
- Home
- Kia Forte BD 2019-2026 Owners Manual
- Kia Forte BD 2019-2026 Service Manual
- First Generation
- Second generation
- Kia Forte TD 2014-2018 Owners Manual
- Kia Forte TD 2014-2018 Service Manual

Copyright ® www.kifomanual.com 2014-2026