
 Kia Forte: Crash Pad Upper Panel Replacement
Second generation YD (2014-2018) / Kia Forte TD 2014-2018 Service Manual / Body (Interior and Exterior) / Crash Pad / Crash Pad Upper Panel Replacement
|

|

| 1. |
Remove the center fascia panel.
(Refer to Crash Pad - "Center Fascia Panel")
|
| 2. |
Remove the cluster fascia panel.
(Refer to Crash Pad - "Cluster Fascia Panel")
|
| 3. |
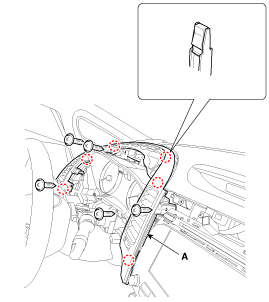
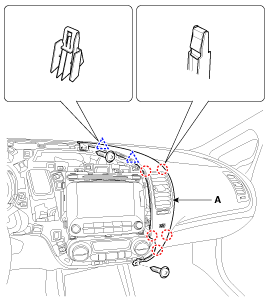
After loosening the mounting screws, then remove the drive airvent
duct assembly (A).
|
| 4. |
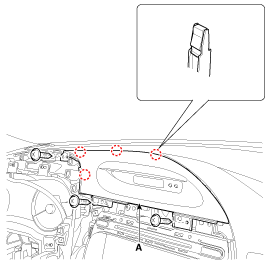
After loosening the mounting screws, then remove the clock fascia
panel (A).
|
| 5. |
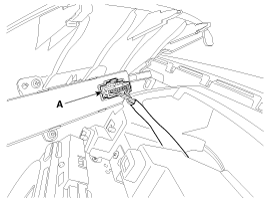
Disconnect the clock switch connector (A).
|
| 6. |
After loosening the mounting screws, then remove the center airvent
duct assembly [RH] (A).
|
| 7. |
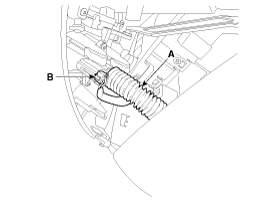
Remove the in-car hose (A).
|
| 8. |
Disconnect the in-car sensor connector (B).
|
| 9. |
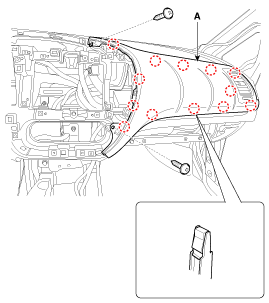
After loosening the mounting screws, then remove the crash pad
upper panel (A).
|
| 10. |
Install in the reverse order of removal.
|

 Crash Pad Upper Panel Component Location
1. Crash pad upper panel
...
 Crash Pad Lower Panel Component Location
1. Crash pad lower panel
...
See also:
Instrument Cluster Control
Adjusting Instrument Cluster Illumination
The instrument panel illumination intensity can be adjusted by pressing the control
switch with the headlight switch in any position when the ignition s ...
AGM Battery Specification
Item
Specification
Model type
AGM 70L-DIN
Capa ticy [20HR / 5HR] (AH)
70/56
Cold Cranking Amperage (A)
760 (SAE) / 610 (EN)
...
Explanation of scheduled maintenance items
Engine oil and filter
The engine oil and filter should be changed at the intervals specified in the
maintenance schedule. If the car is being driven in severe conditions, more frequent
oil and filt ...
Categories
- Home
- Kia Forte BD 2019-2026 Owners Manual
- Kia Forte BD 2019-2026 Service Manual
- First Generation
- Second generation
- Kia Forte TD 2014-2018 Owners Manual
- Kia Forte TD 2014-2018 Service Manual

Copyright © www.kifomanual.com 2014-2026