 Kia Forte: Rear Bumper Cover Replacement
| (4Door) |
|

|

| 1. |
Remove the luggage side trim [LH].
(Refer to "Trunk Trim")
|
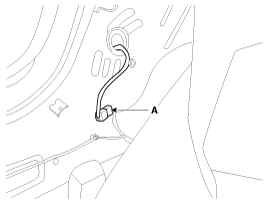
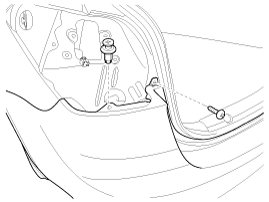
| 2. |
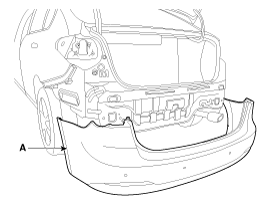
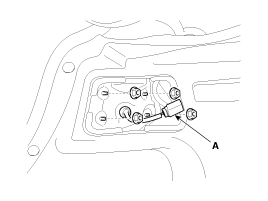
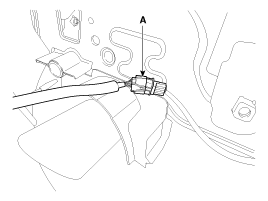
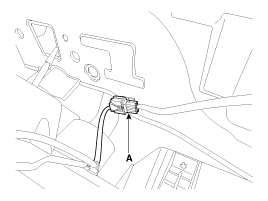
Disconnect the rear bumper main connector (A).
|
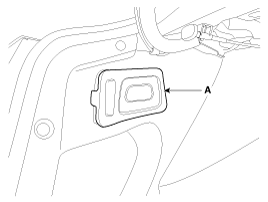
| 3. |
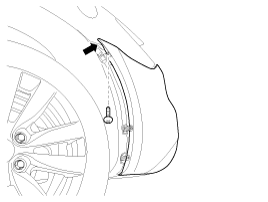
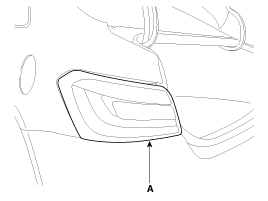
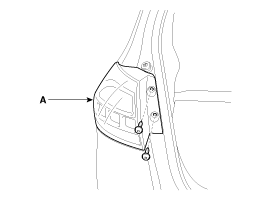
Remove the rear combination lamp cover [RH] (A).
|
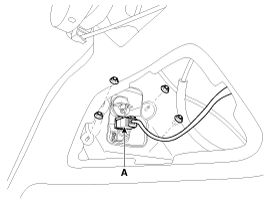
| 4. |
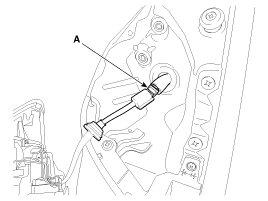
Disconnect the connector (A), and then loosen the rear combination
lamp mounting nuts.
|
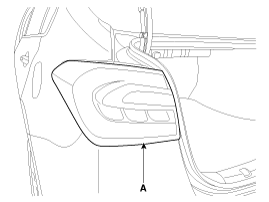
| 5. |
Remove the rear combination lamp (A).
|
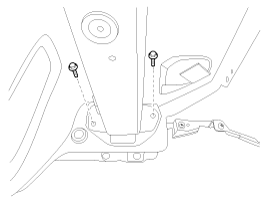
| 6. |
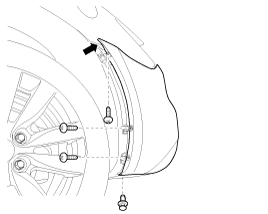
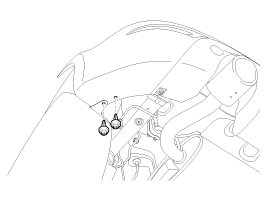
Loosen the rear bumper upper mounting screw and clip.
|
| 7. |
Loosen the rear bumper lower mounting clips.
|
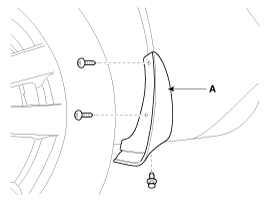
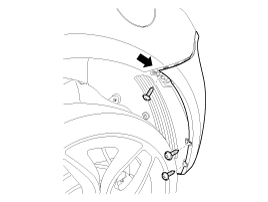
| 8. |
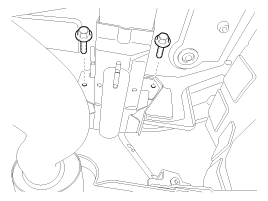
Loosen the mounting bolts.
|
| 9. |
After loosening the mounting clip and screws, then remove the
rear mud guard (A).
|
| 10. |
After loosening the rear bumper side's mounting screw, then disconnect
the side's.
|
| 11. |
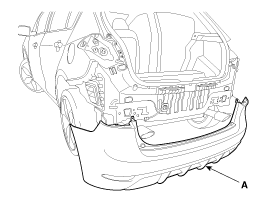
Remove the rear bumper cover (A).
|
| 12. |
Install in the reverse order of removal.
|

|
|
| 1. |
Remove the rear combination lamp cover (A).
|
| 2. |
Disconnect the connector (A), and then loosen the rear combination
lamp mounting nuts.
|
| 3. |
Remove the rear combination lamp (A).
|
| 4. |
Loosen the rear bumper upper mounting screw and clip.
|
| 5. |
Loosen the rear bumper lower mounting clips.
|
| 6. |
Loosen the mounting bolts.
|
| 7. |
After loosening the rear bumper side's mounting screws and cilp,
then disconnect the side's.
|
| 8. |
Remove the rear bumper cover (A).
|

| 9. |
Disconnect the rear bumper main connector (A).
|
| 10. |
Install in the reverse order of removal.
|
|
|
| 1. |
After loosening the mounting screws, then remove the rear combination
lamp (A).
|
| 2. |
Disconnect the rear combination lamp connector (A).
|
| 3. |
Loosen the rear bumper upper side mounting screw and clip.
|

| 4. |
Loosen the rear bumper lower side mounting clips.
[LH]
[RH]
|

| 5. |
Loosen the rear bumper lower side mounting bolts.
|
| 6. |
After loosening the rear bumper side's mounting screws, then disconnect
the side's.
|
| 7. |
Remove the rear bumper cover (A).
|
| 8. |
Disconnect the rear bumper main connector (A).
|
| 9. |
Install in the reverse order of removal.
|
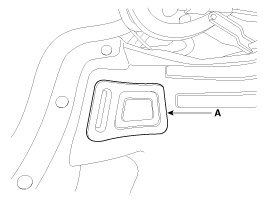
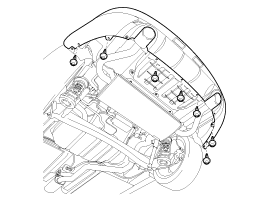
 Rear Bumper Cover Component Location
(4Door)
1. Rear Bumper Cover
(2Door)
1. Rear bumper cover
(5Door)
1. Rear bumper cover
...
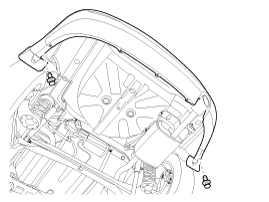
 Rear Bumper Beam Assembly Component Location
(4Door, 2Door)
1. Rear bumper beam assembly
(5Door)
1. Rear bumper beam assembly
...
See also:
Manifold Absolute Pressure Sensor (MAPS) Specification
Pressure [kPa (kgf/cm², psi)]
Output Voltage (V)
20.0 (0.20, 2.9)
0.79
46.7 (0.47, 6.77)
1.84
101.3 (1.03, 14.7)
4.0
...
Intake Actuator Replacement
1.
Disconnect the negative (-) battery terminal.
2.
Remove the glove box housing.
(Refer to Body -"Glove Box Housing")
...
Spark Plug Description
A spark plug is a device for delivering electric current from an ignition
system to the combustion chamber of a spark-ignition engine to ignite the compressed
fuel/air mixture therein by mean ...
Categories
- Home
- Kia Forte BD 2019-2026 Owners Manual
- Kia Forte BD 2019-2026 Service Manual
- First Generation
- Second generation
- Kia Forte TD 2014-2018 Owners Manual
- Kia Forte TD 2014-2018 Service Manual
