 Kia Forte: Rear Seat Back Cover Replacement
Second generation YD (2014-2018) / Kia Forte TD 2014-2018 Service Manual / Body (Interior and Exterior) / Rear Seat / Rear Seat Back Cover Replacement
| (4Door, 2Door) |
[LH]
|

|

| 1. |
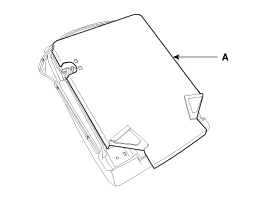
Remove the rear seat back assembly [LH].
(Refer to Rear Seat - "Rear Seat Assembly")
|
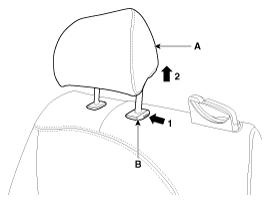
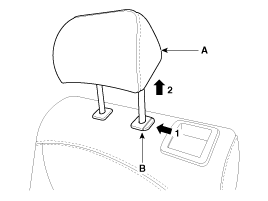
| 2. |
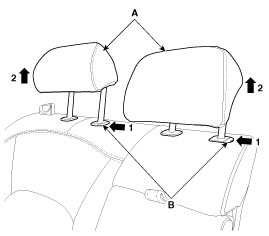
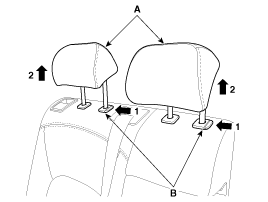
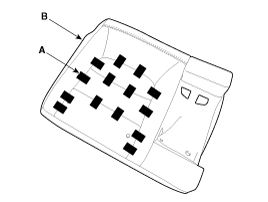
Push the lock pin (B), remove the rear seat headrest (A).
|
| 3. |
After loosening the mounting screws, then remove the rear seat
back webbing guide (A).
|
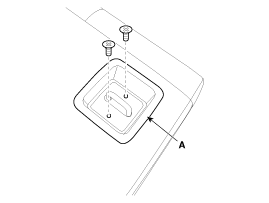
| 4. |
After loosening the mounting screws, then remove the rear seat
back latch cover (A).
|
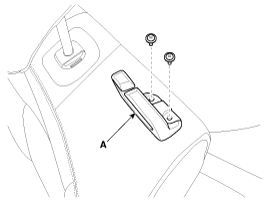
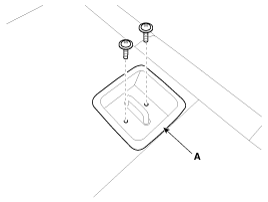
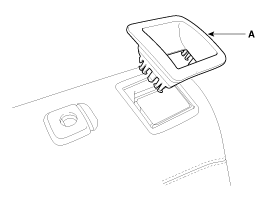
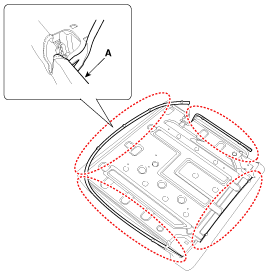
| 5. |
Remove the protector (A) located in the bottom side of the rear
seat back.
|
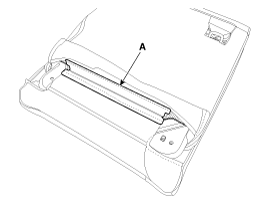
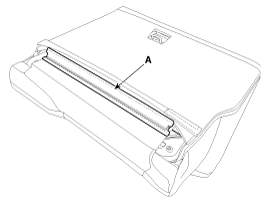
| 6. |
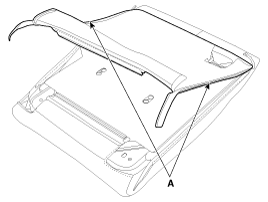
Zip off the rear seat back cover located in the side (A), and
then pull it up.
|
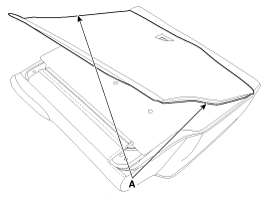
| 7. |
Turn the rear seat back cover inside out. Then pull out the headrest
guides (A) while pinching both sides of the lower part of the guides,
and remove them.
|

| 8. |
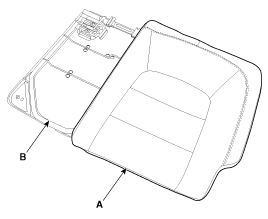
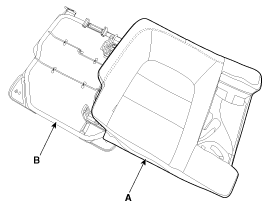
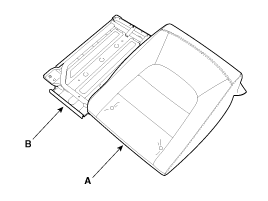
Remove the rear seat back cover (A) from the rear seat back frame
(B).
|
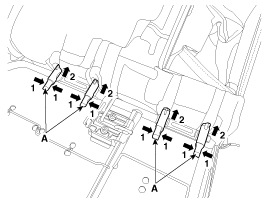
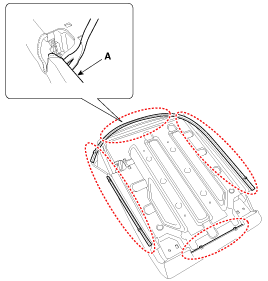
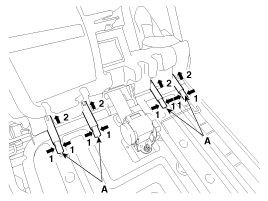
| 9. |
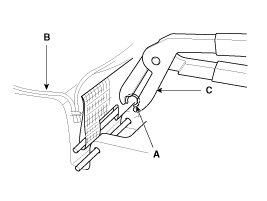
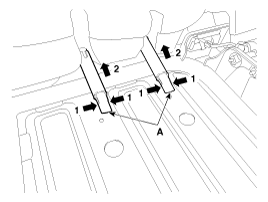
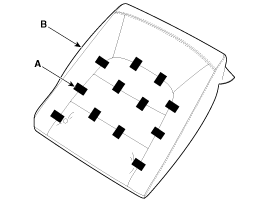
After removing the hog-ring clips (A) on the rear of seat back
and remove the rear seat back cover (B).
|
| 10. |
Install in the reverse order of removal.
|

[RH]
|
|
| 1. |
Remove the rear seat back assembly [RH].
(Refer to Rear Seat - "Rear Seat Assembly")
|
| 2. |
Push the lock pin (B), remove the rear seat headrest (A).
|
| 3. |
After loosening the mounting screws, then remove the rear seat
back webbing guide (A).
|

| 4. |
After loosening the mounting screws, then remove the rear seat
back latch cover (A).
|
| 5. |
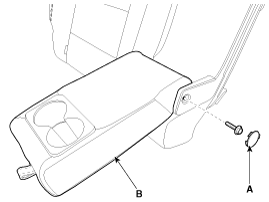
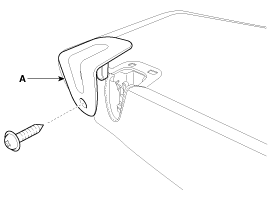
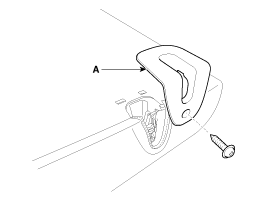
Remove the rear back armrest cap (A).
|
| 6. |
After loosening the mounting bolt, then remove the rear back armerst
(B).
|
| 7. |
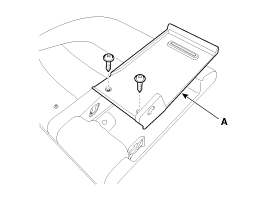
After loosening the mounting screws, then remove the rear back
armerst panel (A).
|
| 8. |
Remove the protector (A) located in the bottom side of the rear
seat back.
|
| 9. |
Zip off the rear seat back cover located in the side (A), and
then pull it up.
|
| 10. |
Turn the rear seat back cover inside out. Then pull out the headrest
guides (A) while pinching both sides of the lower part of the guides,
and remove them.
|
| 11. |
Remove the rear seat back cover (A) from the rear seat back frame
(B).
|
| 12. |
After removing the hog-ring clips (A) on the rear of seat back
and remove the rear seat back cover (B).
|

| 13. |
Install in the reverse order of removal.
|
| (5Door) |
[LH]
|
|
| 1. |
Remove the rear seat back assembly [LH].
(Refer to Rear Seat - "Rear Seat Assembly")
|
| 2. |
Push the lock pin (B), remove the rear seat headrest (A).
|
| 3. |
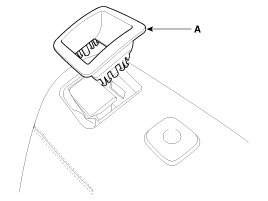
Using a screwdriver or remover, remove the rear seat back upper
bezel (A).
|
| 4. |
After loosening the mounting screw, then remove the rear seat
back latch cover (A).
|
| 5. |
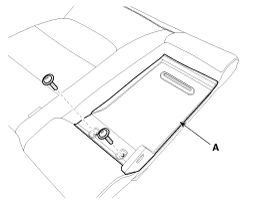
Disconnect the rear seat back cover hooks (A).
|
| 6. |
Remove the rear seat back panel (A).
|
| 7. |
Turn the rear seat back cover inside out. Then pull out the headrest
guides (A) while pinching both sides of the lower part of the guides,
and remove them.
|
| 8. |
Remove the rear seat back cover (A) from the rear seat back frame
(B).
|
| 9. |
After removing the hog-ring clips (A) on the rear of seat back
and remove the rear seat back cover (B).
|
| 10. |
Install in the reverse order of removal.
|
[RH]
|
|
| 1. |
Remove the rear seat back assembly [RH].
(Refer to Rear Seat - "Rear Seat Assembly")
|
| 2. |
Push the lock pin (B), remove the rear seat headrest (A).
|
| 3. |
Using a screwdriver or remover, remove the rear seat back upper
bezel (A).
|
| 4. |
Using a flat-tip screwdriver, push the locking pin (B) and then
remove the rear center seat belt upper anchor cover (A).
|

| 5. |
After loosening the mounting screw, then remove the rear seat
back latch cover (A).
|
| 6. |
Remove the rear back armrest cap (A).
|
| 7. |
After loosening the mounting bolt, then remove the rear back armerst
(B).
|

| 8. |
After loosening the mounting screws, then remove the rear back
armerst panel (A).
|
| 9. |
Disconnect the rear seat back cover hooks (A).
|
| 10. |
Remove the rear seat back panel (A).
|
| 11. |
Turn the rear seat back cover inside out. Then pull out the headrest
guides (A) while pinching both sides of the lower part of the guides,
and remove them.
|
| 12. |
Remove the rear seat back cover (A) from the rear seat back frame
(B).
|
| 13. |
After removing the hog-ring clips (A) on the rear of seat back
and remove the rear seat back cover (B).
|
| 14. |
Install in the reverse order of removal.
|
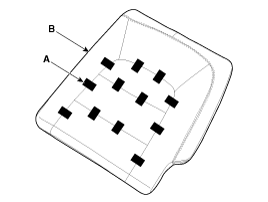
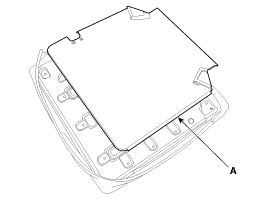
 Rear Seat Back Cover Component Location
(4Door, 2Door)
1. Rear seat back cover [LH]
2. Rear seat back cover [RH]
(5Door)
1. Rear seat back assembly [LH]
2. Rear seat ...
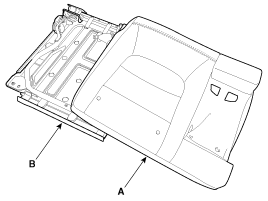
 Rear Seat Cushion Cover Component Location
1. Rear seat cushion cover
...
See also:
Cowl Cross Bar Assembly Component Location
1. Cowl cross bar assembly
...
ETC (Electronic Throttle Control) System Specification
Throttle angle (┬░)
Output voltage (V) [Vref = 5.0V]
TPS1
TPS2
0
0.5
4.5
10
0.96
4.05
20
1.4 ...
DC/DC Converter Description
Due to the considerably more frequent occurrence of starting operations,
the electrical load that occurs often leads to voltage dips in the vehicle network.
In order to stabilize the power s ...
Categories
- Home
- Kia Forte BD 2019-2026 Owners Manual
- Kia Forte BD 2019-2026 Service Manual
- First Generation
- Second generation
- Kia Forte TD 2014-2018 Owners Manual
- Kia Forte TD 2014-2018 Service Manual

Copyright ® www.kifomanual.com 2014-2026