
 Kia Forte: Control Cable Installation
Second generation YD (2014-2018) / Kia Forte TD 2014-2018 Service Manual / Manual Transaxle System / Manual Transaxle Control System / Control Cable Installation
|

| 1. |
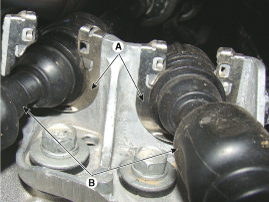
Install the control cable (B) and clip (A) on the bracket.
|
| 2. |
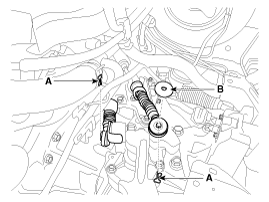
Install the washer (B) and pin (A).
|
| 3. |
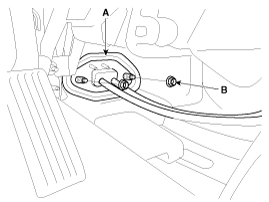
Tighten the nut (B) after install the retainer (A).
|
| 4. |
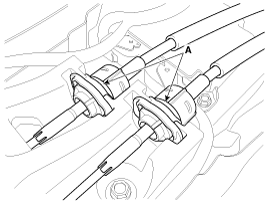
Install the cable socket (A) on the shift lever assembly.
|
| 5. |
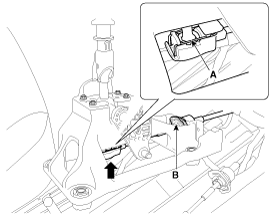
Install the shift cable (B) and clip (A).
|
| 6. |
Shift lever to "3rd".
|
| 7. |
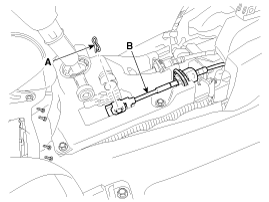
Install the snap pin (A) after install the select cable (B).
|

| 8. |
Install the floor console assembly.
(Refer to Body - " Floor Console")
|
| 9. |
Install the battery and battery tray.
(Refer to Engine Electrical System - "Battery")
|
| 10. |
Install the air cleaner assembly.
(Refer to Engine Electrical System - "Battery")
|
 Control Cable Removal
1.
Remove the floor console assembly.
(Refer to Body - " Floor Console")
2.
Remove the select cable (B) by removing the snap ...
 Control Cable Adjustment
Select cable adjustment
1.
Remove the select cable snap pin (A) and then remove the select
cable (B) from the shift lever pin.
2.
...
See also:
Output Speed Sensor Installation
1.
Install in the reverse order of removal.
After replacement or reinstal ...
Inspection
Front brake disc thickness check
1.
Check the brake pads for wear and fade.
2.
Check the brake disc for damage and cracks.
...
Basic Service Symbols
There are five primary symbols used to complement illustrations. These symbols
indicate the part to apply such materials during service.
Symbol
Meaning
...
Categories
- Home
- Kia Forte BD 2019-2026 Owners Manual
- Kia Forte BD 2019-2026 Service Manual
- First Generation
- Second generation
- Kia Forte TD 2014-2018 Owners Manual
- Kia Forte TD 2014-2018 Service Manual

Copyright � www.kifomanual.com 2014-2026